Showing posts with label Red/White Dot Washi Tape. Show all posts

Sunday, July 13, 2025

Summer Picnic Basket


It's summer and that means it's time for picnics. My card today features a fun picnic basket decorated with EO brads and washi tapes. 

The bow of this beauty was made with paper covered with Red/White Dot Washi Tape. The basket liner is made of Heart Washi Tape.

The basket is constructed with a stamp and die set. Once I put it all together, I added BBQ Brads, putting a grill on each side of the sentiment. I added two Mini Ant Brads and a red hot pad from the Cooking Brads. 

The top of the basket is embellished with a pull made of the Red/White Dot Washi Tape. A  6 mm red jewel brad secures it to the basket top. It adds just a bit of sparkle!


Please visit the EO store for all your brads, washi tape, bling and paper flowers!

Happy Creating!

Sunday, June 22, 2025

Washi Tape Magic! Creating a Unique Birthday Card


Today, I'm excited to share a cheerful birthday card that truly shines, all thanks to some clever use of Eyelet Outlet's fantastic washi tapes! I dug into my stash and pulled out a versatile die that cuts both a frame and coordinating inner panels – perfect for showcasing these fun patterns.

First, for the striking frame, I used Foil Washi Tape - Silver Stars Tape. The trick here is to lay strips of the washi tape onto white cardstock before running it through the die. The result? A perfectly shimmering silver frame with crisp white stars that truly pops!

Next, I tackled the inner panels with the same technique. For the larger sections, I covered white cardstock with strips of the lovely Flower Washi and Strawberry Washi. The bright red and white polka dot panels were created in the exact same way, using the adorable Red/White Dot Washi Tape. This method allows you to transform plain cardstock into custom patterned paper, giving your project a truly unique look.

Since this is a birthday celebration, I cut a "Happy Birthday" sentiment from cardstock and added two elegant Rose Brads on each end as a delightful accent. To complete the festive scene, I cut a simple circle and adorned it with three bright Balloon Brads. I used green and yellow baker's twine to create "strings" for each balloon, running them behind the birthday sentiment. A small green and white ribbon bow at the base of the strings added a final touch of charm.

This card was incredibly fun to make, proving how you can use a basic die and washi tapes to achieve a genuinely one-of-a-kind result. I highly encourage you to give this technique a try! Eyelet Outlet boasts hundreds of washi tape patterns, so I'm confident you'll find the perfect design to fit any theme you can imagine and the perfect brads to go along with it.

I'll see you next week but until then please visit the EO store for all your brads, washi tape, bling and paper flowers!

Happy Creating!


Janet YouTube - Blog - Facebook - Instagram - Pinterest  

Sunday, April 13, 2025

Magical Tea House


 Hello EO friends! Today I have made a magical card full of whimsy and cheerful fun. It features a tea house perfectly made for two cute Girl Gnome Brads. Flying above in the blue sky are the new Mini Butterfly Brads.

To make this card, I first cut a piece of white cardstock 3 1/4" x 4 1/2." I cut it in half to form two long narrow pieces. I applied strips of Red/White Dot Washi to one strip and Strawberry Washi to the other. Then I cut each strip in half so that I had 4 rectangles of equal size. I placed the pieces on my score board and spaced each the same apart from each other, using the score lines as a guide. To keep them in place I attached them each together with a strip of washi tape. Be sure to lay out the pieces right side up as you do this. Next I added foam tape strips to the back of each rectangle and then I placed them as one piece on a white A2 card base. Once in place, I removed the washi tape that held each piece in place. This technique makes each rectangle perfectly spaced without any hassle or guessing. It's an old cardmaking technique but a good one!

Shopping List:

Thanks for joining me here today. Please stop by the EO store for all your brad, washi tape, bling, and paper flower card making supplies.

Sunday, October 23, 2022

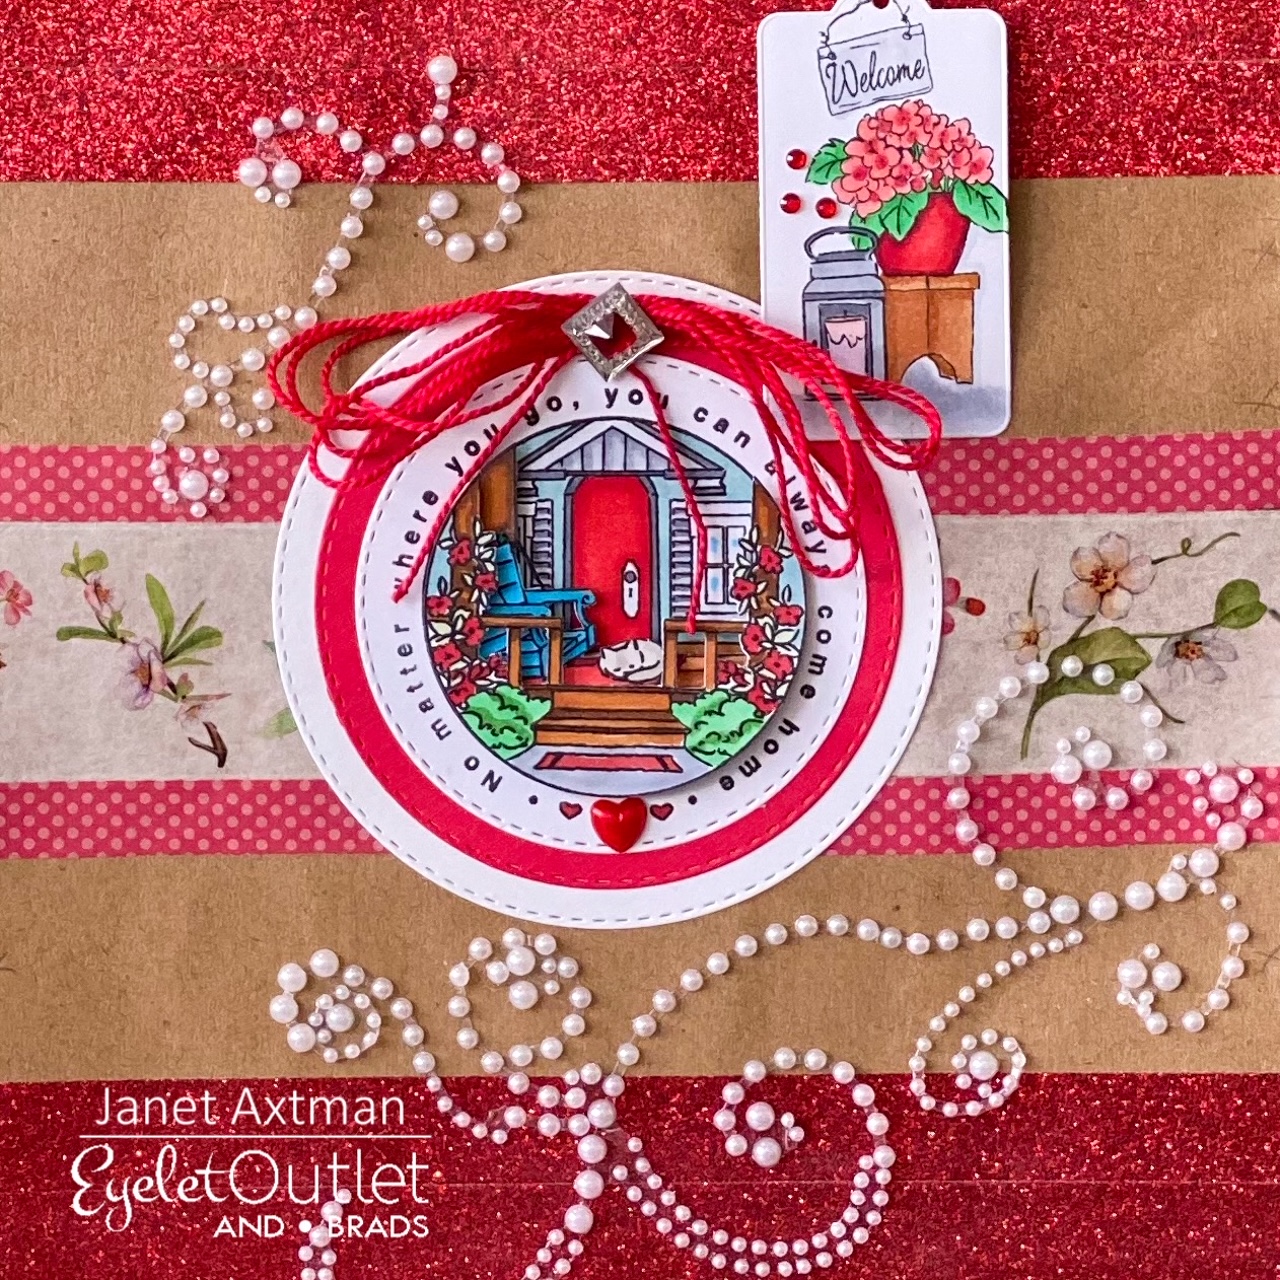
Welcome Neighbor Gift Bag


While we usually think of using Eyelet Outlet products on cards and scrapbooks, you can use them for packages and bags too. The Design Team has produced many wonderful bags and boxes over the years decorated with EO products. 

As they say, Necessity is the Mother of Invention. In my case, I needed a decorative bag to welcome a new neighbor on my street. I had made some cookies and instead of making a card, I thought a home themed bag and tag would be a nice thing to use as well as practical. 

I started with a plain brown paper gift bag, I added stripes of Sparkle Red Glitter Washi Tape. It adds the sparkle I wanted and it works so much better than glitter cardstock because it flexes with the bag. I also added Red/White Dot Washi Tape. I wanted to add something floral to go with the floral images in my stamps so I used one of my favorites Flower Washi Tape. I accented the little tag with Red Jewel Multi-Size Bling. Then to make a big splash and make this bag extra special, I added White Pearl Swirl Bling. The last details were a Square Jewel in green and a Red Pearl Heart.


I am pleased with how this bag turned out. It's really quite pretty and definitely has a lot of handmade charm to offer. I will be delivering my cookies with pride in this gift bag. The same technique can be used to make a bag for any holiday or celebration. Take a look at your bag stash and see what you come up with!

Shopping List:

Thanks for stopping by today. Please visit the store for all your brads, washi tape, bling and paper flowers!

Happy Creating Everyone!


Janet YouTube - Blog - Facebook - Instagram - Pinterest

Sunday, April 10, 2022

Spring & Wine - A Great Combination!


Hey everyone! It's Janet and with spring in full bloom, I'm looking forward to longer days and time to sit on the porch with a favorite glass of wine. This thought inspired me to create today's card. I started by picking out the Wine Washi Tape and two other coordinating washi tapes (see linked list below). I used Cricut Design Space to cut a red mat and white card front. I also found the hello sentiment with the arrow and created a shadow for it. Since the sentiment was small, I cut the hello script and the arrow from white and metallic vinyl. When something is too small to be cut successfully out of paper, vinyl is a great alternative.

After placing the washi tapes, I added three paper flowers and secured them with a wine bottle brad from the Wine Brad set. I also used the red wine glass brad from the set and placed it near the sentiment. I added silver and blue glitter enamel dots and a small heart enamel dot to balance everything out. 

I just love this card and how cheery and fun it is. This is perfect for someone who shares your love of wine. 

SHOPPING LIST:

Thanks for stopping by today. Please visit the store for all your brad, washi tape, bling and paper flowers!

Happy Creating Everyone!


Janet YouTube - Blog - Facebook - Instagram - Pinterest