Showing posts with label tutorial. Show all posts

Wednesday, August 11, 2021

Let's Make Tape Squares

I (Lauren) never get tired of playing with my Eyelet Outlet Washi collection, I'm always excited to come up with new ideas. This birthday card has background made entirely of Chevron Tape strips, which is so fun and colorful that it only needed a few brads... (a Party Hat, a Birthday Sock Monkey and a Birthday Cake, to be precise) ...plus some EO Sequins to finish it off!


Here's how I made that quilt-like background; note that I switched to Pencil Tape for the second sample. I neatly applied strips of tape to plain white cardstock, cut them apart with my guillotine trimmer, then cut the lengths so they were all exactly the same size, in this case, about 3". I affixed them to another piece of plain cardstock, starting at the center and working outward, as you can see in the photos below. 

To answer the obvious question: Yes, you could apply strips of tape directly to your background and skip the step of backing them with cardstock; but I found it hard to get the cuts on the short ends absolutely straight, and also it was more challenging to line them up precisely.  


When all the strips were applied to the background, I trimmed up the ends and matted the whole panel on some red cardstock, added a Paper Flower stack and a Heart Brad and called it good to go!


Now I want to try this with ALL of my EO Tapes, including the wide ones, the skinny ones and the glitter ones!

loooooooves washi tape! 


Tuesday, July 25, 2017

Washi Tape Masking with MISTI Gel Press Plate Printing

Today I'm going to share with you cards I made using a stamping and masking technique using Eyelet Outlet Washi Tape, my Gel Press Plate and My MISTI.

I started with a piece of 4 1/2" x 6" watercolor paper.  I attached my 5" x 7" Gel Press Plate to my MISTI and stamped it several times using Yellow Ink to create the base.


Next I attached Glitter Washi Tape to create my grid design (I used glitter washi tape because it came in three different widths and it resisted the ink very well).  After it was attached, I inked my Gell Press Plate with Blue Ink and stamped until I had good coverage (which created the fun green when the two inks combined).


I removed the tape, which left the yellow stripes below.  I also took a Ghost Print, which is stamping on a second piece of Water Color Paper with the ink that was left on the Gel Press Plate, which creates sort of a reverse pattern since there was more ink where it didn't sink into the Washi Tape.


Final step was to make some fun cards.  Sentiments are perfect to stamp in the Washi Tape resist lines.


Here's my first card featuring a sentiment from Essentials by Ellen Crafty Ladies together with a Triangle Brad & a Super Hero Saying Brad (because Crafty Friends are Super Heroes).
For the Ghost Print, I stamped a large bold sentiment from EBE Crafty Ladies and added two different widths of Black Glitter Washi Tape along the washi lines in the background.

I embellished with an Eyelet Outlet Paper Flower (topped with a smaller flower from my stash) and piece of black bumpy bling for the center.

Here's one more I made also combining some Wide Washi Tape to provide a wider area for sentiment stamping.


This sentiment is from Joy Claire Hello Sentiments.  I added some Gold Glitter Washi Tape to frame the sentiment and finished with Pink and Maroon Glitter Enamel Dots.

Products Used:


You can visit me in blogland at Ingenious Inkling

Tuesday, March 8, 2016

Bunny Butt Love

When I saw these fun Bunny Butt cookies by Pillsbury, I knew this would make an adorable card.


I started with 12mm Clear Bumpy Bling in circles and hearts.  Next I turned my clear bling into colored bling using Spectrum Noir BP2 Marker.

It's easy to color them on the craft sheet because the adhesive backs release when you're done.


I decided to spray on a sealant to make sure the ink stayed, but accidentally grabbed my can of glitter spray instead.  I decided to give it a try, because bling can always use a little more bling.


Next I cut out two oval dies to make my bunny feet and added the bling.  The bunny body is a large circle die cut (for the Die Cut Challenge at Challenge Up Your Life).


I layered three punched flowers to make the bunny tail and then decided the tail could use a little White Round Jewel in the center.

I die cut a circle from the front of my wood grain card base and backed it with kraft cardstock, so the bunny would have a hole to dive into.  I finished with a Tim Holtz Sentiment Sticker.


Eyelet Outlet products used:
Stephanie Severin

Saturday, March 5, 2016

Green Shabby Chic Cards with Flower Video Tutorial

I just love playing with monotone colors on cards, and then having a stash of "blank" card ready to go when I need them.  I just made a yellow card for the Feb inspiration and here is my next in the series of shabby chic cards, Green! 


I made these beautiful flowers from flat paper flowers from Eyelet Outlet.  They are already beautiful, I just wanted something fuller for the card.  Below is my video tutorial on how I made these super easy and beautiful flowers.


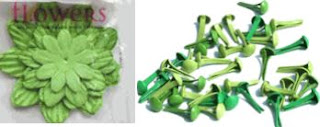
Here are the Green Glowers and 1/16 Green round brads I used for the flowers and how amazing they look on the card!
http://www.eyeletoutlet.com/


I then added to the card some awesome Green stickyback bling from the Eyelet Outlet store.  It was just perfect for my super green card!! 

http://www.eyeletoutlet.com/
Here are some up close pictures of the card.


Now what color card should I make next?

Supplies Used
Card Base - Canvas Corp
Papers - Canvas Corp
Rope - Canvas Corp
Lace - 7 Gypsies
Paint/Mists - Tattered Angels
Flower Mist - Clearsnap
Ink - Clearsnap
Stamp - Clearsnap
Chipboard - Creative Embellishments
Sticker Maker/Tape Runner - Xyron
Glue  - Beacon'
Enjoy!