Thursday, July 6, 2017

Selfie Snowman

I'm not sure what the origin of "Christmas in July" is, but my guess it was coined by a fellow crafter who began working on her Christmas cards in July to make sure she was finished by December!

Today I'm bringing you a cute little Christmas card featuring Eyelet Outlet's Cell Phone & Selfie Brads.


The snowman in my card is made from one of the snowmen on the Cricut Snow Friends cartridge.  I used the slice tool from Cricut Design Space to achieve a real close up shot of just the snowman's head.  I found the branch I used for his hand on the Cricut Creepy Critters cartridge.  Using the print-then-cut feature in Cricut Design Space for my navy blue background enabled me to use white for my font color.  


I added a sweet little Eyelet Outlet Snowflake Brad and of course, a touch of Sticky Backed Bling to the snowflakes in my overlay for some sparkle.  

Stop by Eyelet Outlet today and check out the many wonderful products in our Holiday Brads Collection to make your 2017 Christmas cards the best ever!  And be sure to follow the blog every Saturday this month for more Christmas inspiration!


Friends Always...

Hello Everyone,

Today I'm back with a vintage style card inspired by lasting friendships and adorable fawns!! I've wanted to use these Fawn Brads since I first saw them but I couldn't think of how to use them until I decided to make this friendship card and then I realized the fact that they face each other was a perfect pose for this card!
I used some of our  White Paper Flowers layered up with my own creative flower center and brushed them with some ink to blend in with the card. For the center I combined our 8mm Spring Brad Mix with our Green Pearl Bling Strips and because the card has a vintage look to it, I sanded the brad & pearl bling until they were dull:


I added the Brown Pearl Bling in place of some of the berries (I just can't get enough of EO's pearl bling strips!), to add some extra flare:


Because these fawns are so adorable, I wanted to add some to the inside:


I also added some more of the Brown Pearl Bling to the flower centers to give them some extra flare:


Well I hope you enjoyed todays project and that it's inspired you to create something of your own.


If you'd like to see more of my projects you can visit  My Blog, to see some of my project video tutorials you can visit My YouTube Channel


Thanks for stopping by and have a safe and creative day Everyone!


Wednesday, July 5, 2017

Many Multi-Layer Mandalas

Hi folks, it's Lauren here again! I was lucky enough to receive some incredibly cool layered mandala dies for my birthday, from my friend and fellow Eyelet Outlet designer Stephanie Severin, and of course my first thought was: how cool they would look when paired with Eyelet Outlet bradswashi tape and paper flowers! Here are a couple of cards that I think prove my point, lol:


My first idea was to cut each layer of the mandala in a different color, and reassemble them all using classic small 1/8" Round Brads and teeny 1/16" Round Brads as accents. Luckily both varieties come in loads of beautiful colors, so I had plenty of choice. As I was stacking up the embellished layers, I noticed that the smallest and largest of my Purple Paper Flowers were the perfect size to be incorporated into the design, and they added even more color and texture! When I was assembling the finished card, I realized that the one thing that was missing was *SPARKLE* so I added a border of Skinny Glitter Washi Tape to the mat under my mandala, and it was the perfect accent!


My second card was inspired by the leftover mandala layers, and how much I loved mixing them with the Paper FlowersI started stacking them in different combinations, and instead of using the center from the die, I grabbed these fun Daisy Flower Brads, which are rather mandala-like, don't you think? I added Champagne Swirl Bling (though there were actually quite a few colors which looked equally cool!) and some Foil Dots Tape and called it good.


I hope you'll be inspired to look at your dies --and your EO Brads!-- and see lots of new possibilities. Meanwhile, there are always loads of ideas here on the Eyelet Outlet Blog. Why not scroll down and see what my Wednesday partner Carri is up to today? ♥

has a bit of a thing about mandalas, 
as you can see from even a brief visit to her blog!

Play Hard Gamer! HB2U! Boy Happy Birthday Card!

I haven't played a video game since Atari was a thing so this is a pretty fancy controller compared to what we had back then!  I knew I wanted to make something using these super fun gamer brads! 


All papers are from TPC Studio Hats Off
Game controller is from Father's Day Cricut Cartridge
Play Hard Stamp from Flips Flops Extreme Boy


The Eyelet Outlet Products Used:
Video Game Brads
White and Black enamel dots


Thanks for visiting today!

Follow on Bloglovin 


Follow me on Instagram!
Instagram


Tuesday, July 4, 2017

A Day at the Beach

Happy Independence Day for my American friends, family and followers.  Canada Day is July 1st and had just a few days ago and we spent it at the cottage it only seemed appropriate to make a beach scene for my day at the Eyelet Outlet Blog.


I used three new spring brads from the Eyelet Outlet Store on my card and some seashells I had in my stash also from the Eyelet Outlet. I have been wanting to use those pink flamingos since I got them and finally some water to have them stand in.


The sandcastle is also one of the new spring brads look at the detail on it and the pink flamingos too.


As I was getting organized I spotted  the Turtle another new spring brad from the Eyelet Outlet store, you really need to visit the store and see the awesome brads not just for spring but for all occasions. Can you tell I LOVE the brads from the Eyelet Outlet?

The items I used today:

I've come to the end of my post for today but meet you here again next Tuesday at 12.01 p.m. PDT.

Abstract Washi

Usually when I create with Washi Tape, I try to be very straight and precise, lining-up up each piece next to the other.  But Washi Tape is also perfect for more random, abstract designs.

For today's cards, I started with scraps of cardstock slightly larger than what I wanted for my finished card and just started randomly attaching pieces of washi tape until it felt right.


Next I trimmed the overlapping pieces of tape and added some Yoga Cat brads and a fun Charmed Cat 2 Sentiment from Paper Smooches.  A few more layers of cardstock, and this card was done.  If you're a cat lover, Eyelet Outlet has lots of cat-themed fun.


This technique works with wide washi tape too, although the card will need to be a bit larger to get the same effect.  As you can see, the color of cardstock you use also changes the look of the design.

For this one, I finished with a single Road Side Thank You Arrow Brad and just let the Bicycles be the focus o the design.


I hope I've encouraged you to have some abstract fun with your washi tapes ... enjoy.

Products used:


You can visit me in blogland at Ingenious Inkling

Monday, July 3, 2017

Mascot Grad!

Graduation parties have been popping up here in Michigan.
Personalize a grad card with Eyelet Outlet's Graduation cap brads.
Simply add a cap to a stamped mascot image.


Go Dragons!!

Add glitter washi tape for added interest when you stagger it with regular washi.
Eyelet Outlet enamel dots add a bit of fun with out the shiny bling!


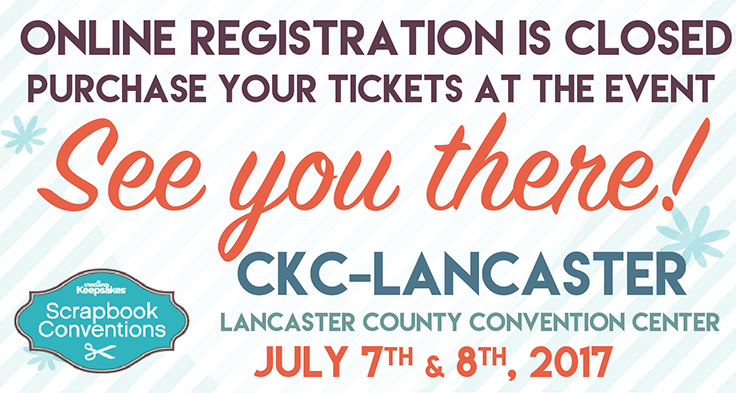
This weekend, we are setting up the Eyelet Outlet booth in


Come check out our brads and enamels....
and our inspiration boards!


Thanks for celebrating with us today.
Have a great 4th of the July Holiday this week!

Dawn Mercedes, of Sunnyside Up


Sunday, July 2, 2017

For My Foxy Friend

Hi Everyone!
It's Nancy and I'm sharing a fun little gift set I made
using Eyelet Outlet's Fox Brads.


For the gift bag tag, I used the Checked Paper Flowers, and a
sleeping fox brad it the centre of the flower.
The tag and sentiment is from Jaded Blossom.


For the card, I used the standing fox brad.
The fence, tag and sentiment are from Jaded Blossom.


Eyelet Outlet products used:

Thanks for stopping by! Have a Great Day!


Saturday, July 1, 2017

Caroling Reindeer

Hello, Eyelet Outlet Fans! It's Christmas in July here at the Eyelet Outlet Blog!  Each Saturday afternoon in July we'll be bringing you a special Christmas themed project, so let's get started!


I've seen a number of adorable caroling reindeer on Pinterest that were created with punches, so I decided I would try my hand at creating one with elements in Cricut Design Space. I think he turned out pretty cute!  I used an Eyelet Outlet Enamel Dot from the Holiday Package for the nose and an Eyelet Outlet Enamel Heart for his tongue!  Can't you just hear him belting out "We Wish You a Merry Christmas"?  

The background paper I used for my card is a print image called "Snowy Village" and it's from Cricut's Snow Angel cartridge.  I think my Eyelet Outlet Snowman Brad and Holiday Tree Brad  look right at home in the village, don't you?  These Snowman Brads are so adorable they make me melt!


There's only 176 more days until Christmas, crafty friends, so stop by Eyeletoutlet.com today and check out all of our amazing Holiday Brads and beautiful Christmas Washi Tapes and be sure to check back next Saturday afternoon for more Christmas inspiration!


Hi.  It's Kim from Katydid Cards and I'm joining in the Christmas in July fun. 

My card features the Deer Brads. I used both the stag and the doe for my scene and I just love how they look against the "snow".

I used an ornament die to frame my scene.  As I wanted it to be hanging from branches, I stamped pine bows across the top.


I stamped the trees on a piece of white card stock after lightly stippling the upper section with blue.  Then I embossed it with the Dots embossing folder and added snow on the bottom with a Snow Marker.  I placed the two deer front and center.  I sponged the edges of the cut before attaching it over the image, added the silver hanger and drew a string with a black marker.  Here's a closer look:


And a quick look at the inside:


You may have already done this with your brads, but I decided to see if I could successfully heat emboss the deer in gold.  I tapped them onto a VersaMark stamp pad, dredged it in gold embossing powder and heated it.  I lost a bit of detail: but the EO brads have so much detail to them, they still came out beautifully. 


A Toast to You

Hi folks!  It's Kim from Katydid Cards with you today!

Last week I shared a card using the bacon and eggs from this adorable set of  Bacon, Egg & Toast brads.  I mentioned then I I just had to use this toast.  It looks so real...pass the butter, please!


 And here's the card I designed:


I decided on a pop-up easel card.  I've used this design in the past and really like the look.  I print and cut the Kitchy Kool digital patterned paper first and color matched it to the card stock.

To make the toaster, I used a cut file from the Silhouette store.  It was actually a card, but I shrunk it down and changed it to print only.  The center pattern also comes from the Kitchy Kool kit.  After printing it, I attached the toast brads so that they appear to be popping out of the toaster.


The greeting and sentiment were color matched to the dark red in the patterned paper.  Inside, I added another slice of toast in the very center and then I embossed the bottom to resemble the pattern in the circles.  It's understated, but just the right touch!


Here's another look at the card, closed and ready for mailing.  You can also see the Cherry Cobbler Baker's Twine I wrapped around the panel...the final step!


I'll see you soon with another project. 


Who provided the inspiration for these cards?  Katy did!