Showing posts with label 3mm Clear Jewel Bling Strip. Show all posts

Saturday, February 3, 2024

Bling it On Baby!


I find it funny how my creative process works. It changes all the time! Although I do have some tried and true methods that I use, like waking up from a crazy dream and creating that wild thought I dreamt of or when I see an everyday item like a drinking glass and suddenly, my mind can see it transformed into a handmade gumball machine.  A lot of these inspirational moments tend to look better in my mind than they do after I create them, but that’s not what it is about. It’s the trying to create them…that is the best part. 


When I sat down to create something for this week’s project, I was having a bad creative block moment and was stuck! I couldn't find inspiration anywhere and let me tell you I tried. As I was sitting there in my craft room, with my pen in one hand paper on the table ready to write or draft an idea, the crafting Gods smacked me upside my head and I had it! I actually think a literal light bulb appeared over my head.

My inspiration was there the whole time, literally in my fingertips. It was the ballpoint pen I was holding!! That boring, plain and just blah ink pen was about to go on the adventure of its little ballpoint life! I knew what needed to be done. It was time to BLING IT UP BABY!


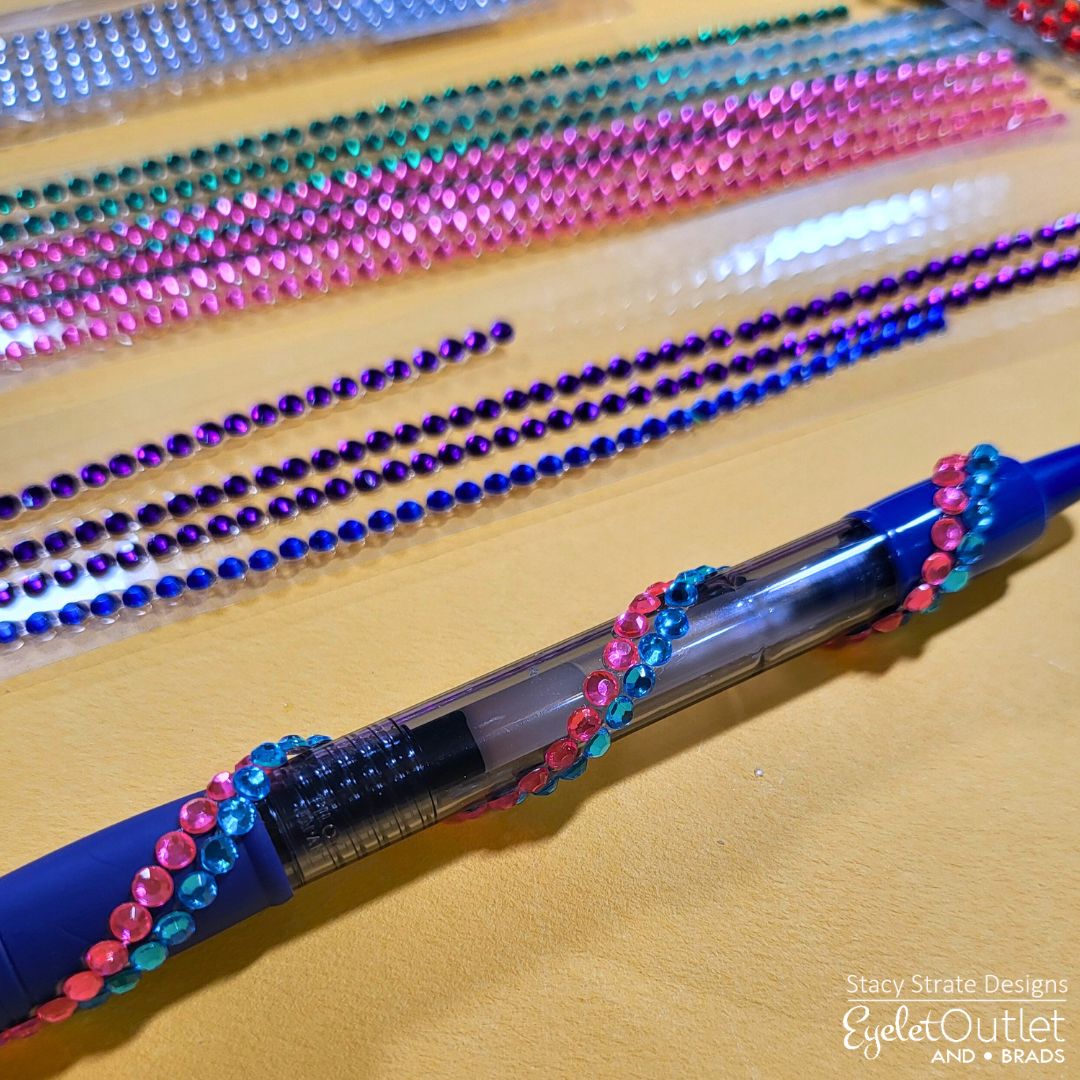
I took that ballpoint pen, grabbed my box of EyeletOutlet bling, and just went to town. The first pen I created was using Blue and Purple Jewel Bling Strips alternating the colors as I went up the pen. This was super easy and surprisingly, took about 10 minutes to create since the bling already had self-adhesive on the back so no gluing was necessary! LOVE!


For the second pen, I wanted to try something a bit different, so I decided to try to bling on a diagonal. Using the same Jewel Bling Strips, I chose the bright and cheerful colors in light green, light pink, blue, purple and clear and alternated them going from bottom to top. Believe it or not, this one took me about 10 minutes as well because the EO bling is so easy to work with. 


I was so excited to see how cute these actually turned out and that they matched what my vision was! I’m not sure if this is good or bad but I am now looking all around my craft room at different items that are calling my name just begging to be blinged! 

I see you, TV! You are on my Bling List! 


Shopping List
Jewel Bling Strips - Multiple Colors

Have a wonderful week and always be STRATE-UP CRAFTY!

💗Stacy

Saturday, January 13, 2024

The New Eyelet Outlet Spring Jewelry Collection!

We all know that Eyelet Outlet has tons of brads, bling and embellishments that help us jazz up our cards and paper crafts, but did you know that you could also use their pretties to make unique one-of-a-kind pieces of jewelry to go with literally any occasion or theme? When it comes to creating something, I seem to think outside the box quite a bit and this is a perfect example.

I decided to try and make some jewelry pieces that I can wear throughout the year using Eyelet Outlet washi tapes, bling, as well as brads.

Introducing Eyelet Outlets Jewelry Collection (not really – but fun to say 😊).

 ❅❅❅ The Snowflake Set ❅❅❅
The first set I made is a winter inspired pendant with matching wintery earrings.

 The pendant is made from three Snowflake Brads, and two clear Jewel Bling. I put them all in a pendant tray and layered some jewelry glaze/glue on top and then sprinkled glitter to give extra sparkle and shine. 


The matching earrings are also made with Snowflake Brads which are also covered with the jewelry glaze. I will be able to wear these throughout the winter season and I the best part is I know that no one else will have these because they are one-of-a-kind.


🥀🥀🥀 The Spring Flower Set ðŸ¥€ðŸ¥€ðŸ¥€
With spring coming up soon, I wanted to make a few pieces that I will be able to wear once the weather starts to warm up. I ended up making three spring inspired sets for the season.


The first spring set are the Spring Flower pieces. I made the pendant using a silver pendant tray and cut out a beautiful flower from the Flower Washi Tape – which I just noticed is out of stock but there are so many other beautiful options available. I placed my cutout from the washi tape into the pendant tray, layered a small amount of jewelry glaze on top and then placed a clear glass cabochon to finish off the pendant.


The matching spring earrings are made using the Colored Daisy Brads.  I removed the clasps and added flat back earring posts onto the back of the brad. I then added different gems and a Clear Jewel Bling to add a bit more color and movement to the earrings. I love these and cannot wait to wear them!


🦋🦋🦋 The Butterfly Set  ðŸ¦‹ðŸ¦‹ðŸ¦‹
One of my favorite parts of spring are all the amazing butterflies that come to visit. This next set was made with them in mind.

 I made the pendant the same way I made the spring flower pendant but instead of a flower, I cut out a beautiful butterfly from the Butterfly Washi Tape.


 The earrings are made very similar to the earrings made for the spring flower set except I used the Butterfly Brads as the base. I removed the prongs and glued flat back earring posts to the butterflies. Turned out super cute and very unique!


🦋🦋🦋 The Tulip Set  ðŸ¦‹ðŸ¦‹ðŸ¦‹
My all-time favorite flower is the tulip so of course I needed to make a set that featured them. 


The pendant is made the same way as the two others above except I cut of the tulips from the Floral Square Washi Tape.


For the earrings, I wanted to keep them simple and cute, so I took two of the Leaf Brads, removed their prongs and glued on flat back posts to the back and now I have the perfect matching earrings for my tulip pendant.


💮💮💮 The Blue Hydrangea Set  ðŸ’®ðŸ’®ðŸ’® 
Last but definitely not least and probably my favorite set is the Blue Hydrangea set. I can almost smell them just but looking at these pictures.


 I selected my favorite hydrangea from the Flower Washi Tape-Wide and created the pendant the same way as the others.


 The earrings turned out extra awesome – IMO.  I had several earring bases in my jewelry making supplies and the Bumpy Jewel Heart Bling fit absolutely perfect into the heart shaped base! Like they were meant to be together. I glued them into the earring base and set them aside to dry.


I wore these yesterday to the grocery and got several compliments on both pieces. Ladies were asking me where I purchased them. I was beyond excited to tell them that I made them myself and explained how easy the process was to make them. They were shocked and excited to try it out themselves.

So, now you know you can always use your Eyelet Outlet products for your usual crafting fun but if you want to try something a bit different, just think outside the box just a little and the sky is the limit on what to create with little imagination and Eyelet Outlet embellishments.

Shopping List

Have a wonderful week and always be STRATE-UP CRAFTY!

💗Stacy


Saturday, December 30, 2023

Winter Wonderland Town Gift Box

So, Christmas is over, but the holiday cheer is still flowing! I’m ready for some SNOW!!! For this week's creation for Eyelet Outlet, I wanted to make something extra special that can be used anytime of the year. I made this with winter and snow in mind.


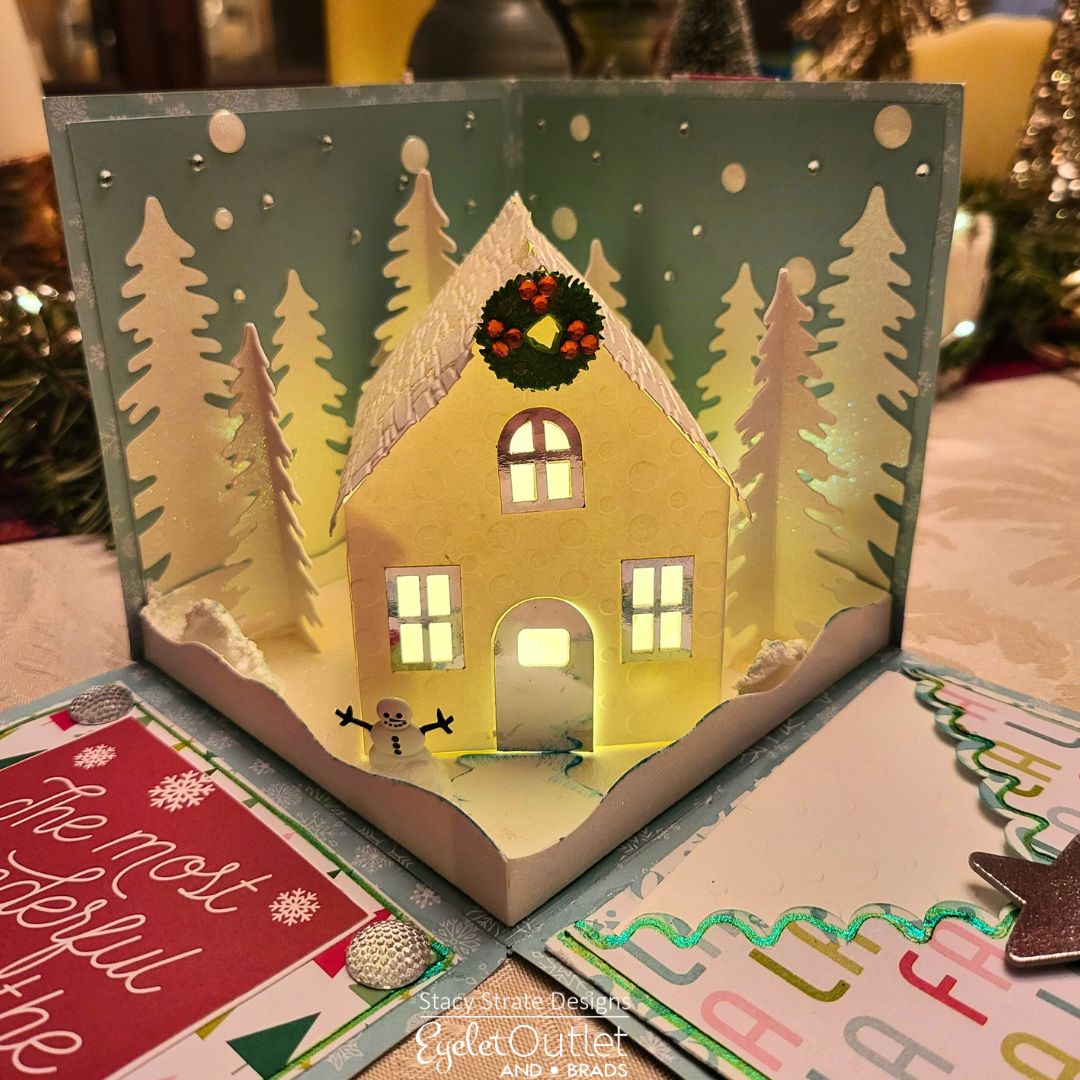
As you can see, it is an adorable gift box with a beautiful candy cane and snowflake embossed paper ribbon on top. The front of the box is adorned with three white snowflake brads that match perfectly to the paper I used to make the box.

Once you lift off the lid of the present, two of the sides fall down to reveal a serene 3-D Winter Wonderland Town that awaits you inside.


One side of the box has a beautiful sentiment accented by four large clear bumpy jewel bling


The other side has a pocket that has a blank embossed square of paper to write your special message.

If you look through the wintery trees in the forest, you will see a cozy cabin surrounded by snowdrifts. The roof has a wreath brad on top where I added some red jewel bling to look like holly berries.


It wouldn’t be a Winter Wonderland Town if it wasn’t snowing. The snowflakes are the clear jewel bling mixed with several of the white glitter enamel dots.

When it snows, you MUST make a snowman so our Winter Wonderland town has its very own snowman brad that welcomes all guests that come to visit.


The Winter Wonderland town holds another special surprise!  Turn off the lights and our cozy cabin is all lit up!!


This Winter Wonderland town gift box was so fun to make, and it is so versatile. I can make it for any season, any occasion, any event, and I know that Eyelet outlet will always have all the extra embellishments I will need to make it extra special.


Have a wonderful week and always be STRATE-UP CRAFTY!

💗Stacy

Saturday, October 14, 2023

Pinata Party

For this week’s project, I choose to feature Eyelet Outlet’s brand new Pinata Brads. I created a super cute pinata themed shaker card that is actually a pinata! Pull on the fringe and out comes some fun glittery confetti.


I created the border using the Groovy Washi Tape and added clear Jewel Bling for sparkle. In the corners, I used blue and orange Cut Jewels.


Hope you enjoyed the Pinata Party!  See you next week.

Have a wonderful week and always be STRATE-UP CRAFTY!

💗Stacy