Showing posts with label pearl strips. Show all posts

Sunday, May 17, 2026

Floral Reverse Double Z Card


Welcome to a card that can't help you feel like a warm summer afternoon. This is a reverse double-z card. The card style features a horizontal strip of cardstock that spans across the card when it's open. The strip was a perfect place to add a strip of pink Fancy Long Bling from the store. I layered three paper flowers in white red and yellow and used a clear Bumpy Bling as the center.


I placed a centered strip of Fancy Strip Bling across the entire strip. I used the flower as the focal point by gluing it to the middle of the strip on top of the bling. Then I added a Bee Brad on the strip and also on the right side of the card. I used Pearl Strip Bling to create bee trails. Finally I added three Mini Butterfly Brads on the left side of the card.

I loved how this card turned out. EO products made it easy to make this card special. The products I used are below.

SHOPPING LIST:
Bumble Bee Brads

Thanks for stopping by today. Please make a visit to the Eyelet Outlet store to stock up on your brads, bling, washi tape, and paper flowers.

Happy Creating!


Friday, February 13, 2026

Valentine Treat Bag


Hello Crafty  Friends - Today I am sharing a Valentine treat bag decorated with Eyelet Outlet embellishments.  This bag is sure to brighten someone's Valentine's Day.

I used a die to create the bag topper.  Then I used Eyelet Outlet heart brads, glitter enamel dots, and pearl strips to decorate the bag topper.

A handmade treat bag can make someone feel special this Valentine's Day.   Thank you for visiting the blog today.  I hope this inspires you to create a fun Valentine treat bag to give to someone special in your life.  Please visit Eyelet Outlet for creative supplies and inspiration.

Shopping List

May you find joy in creating!


Stephanie Wheatley

Friday, May 22, 2020

Miss You Box Card

Today's card entitled "Miss You" is a box card.  It's delicate, sweet, and a card that can remain open and be enjoyed for weeks and months to come! The box card is a great card for shut-ins, hospitals, and nursing homes. 

Eyelet Outlet's Brads, Bling, and Washi Tape are perfect for constructing box cards.  The Large Flower on the back is easy to attach and the Flower Bling is attached to a piece of clear acetate then attached to the box insert. The remaining four flowers are Glitter Rose Washi Tape and Hearts Washi Tape adhered to white paper then die cut.   Eyelet Outlet Sequins are used inside the flower shaker.  Large Heart Bling adorns the side flaps.


Although the box card looks full of flowers and things, the side view shows that it is the multiple layers creating that effect (there's only six flowers).    There's a white strip on the back to write a sentiment and sign the card.   Once you have completed a box card, you'll find it to be addicting! 


The Eyelet Outlet supplies used:

White Flowers
Large Heart Bling
Flower Bling
Pearl Strips
Sequins 
Glitter Rose Washi Tape


Be Safe.  Be Well.  Happy Crafting!


Saturday, February 23, 2019

Decorating Easter Eggs Is Fun!

Oh how I love Washi Tape - I know, I've said that before. But it is so much fun that I just have to say it again and again.  

Just look at these Easter Eggs:


They were made with Washi Tape!!!


I stuck strips of Washi onto heavyweight cardstock and then die cut them with an oval die. To give them some extra pizazz, I added pearls and bling. They were so easy to make, and did I mention fun? I do believe it could become addictive. 


I nestled the two decorated Easter eggs into some grass and added a sentiment. The bling on the sentiment is a little piece that I trimmed off of the bling on the lefthand egg. I couldn't waste it, it was too pretty!


And like I said, egg-decorating is addictive, 
so I made one for the inside of my card, too:


You'll find a WIDE variety of Washi Tape in the Eyelet Outlet Store, as well as bling and pearls to enhance the beauty of the Easter Eggs you're going to want to create!


Have fun! And come back again soon to see what else the design team has to share.


Sunday, June 10, 2018

I {Heart} Apples

I hope you've been coming to the Eyelet Outlet blog often - and have checked out the Eyelet Outlet online store, too... because if you haven't, you've missed the BIG news. What's that?

Eyelet Outlet, who is well known for its awesome (and economical) embellishments now has clear STAMPS, too! That is so exciting!


This is the Apple Stamp Set:


The possibilities for using this stamp set are many - especially when paired with the apple-themed brads available at Eyelet Outlet.

I used this stamp set to make two cards.


Card #1


Card #2


In addition to the Apple Stamp set, 
I used the following Eyelet Outlet products on my cards:


I'll be back next Sunday with two cards featuring Eyelet Outlet's Fan Stamp Set.... I hope you'll come back to see them, too.


Friday, March 2, 2018

Thank You For Your Service

I don't think we say it often enough... so today I want to give a BIG shoutout to ALL of our military personnel. Even though the little Eyelet Outlet Army Men Brads are the focal point of my card today, the sentiment is the same for all of the men and women who serve in every military branch.

THANK YOU for your service!


Eyelet Outlet Products Used:


One of the things that is nice about the Army Men Brads is they are flat enough that you can even add them to the inside of your card...


Be sure to check out all of the products in the Eyelet Outlet online store... and check out the Tradeshow Schedule to see when Eyelet Outlet will be close by so you can visit the booth and see the awesome products in person.


Jeanette
You can also find me on my blog daily

Friday, February 23, 2018

I'll Never Desert You!

Hello one and all!  Susie hosting the blog again and TGIF!

So last week I shared a grid style layout that featured that amazing wide Cactus Washi Tape.  I obviously could not put it away because today I am sharing a card that started with that same tape!


Today is also the first day of my Greeting Card ATC Series! What is an ATC?  An Artist Trading Card is a 2.5" x 3.5" piece of original art.  They can be made in any medium and are intended to be traded with other artists, however,  I am going to be using them as the basis for some cards!

 I started by stamping an image and a sentiment onto watercolor paper...


...and then added washi tape and colored the image. 


Something you will learn about me is that I *love* using arrows as a design element! While I am looking forward to using the Vacation Arrow Sign Brads on another project, today I just needed a plain black arrow. No problem!  I  sanded the surface a bit, pulled out my acrylic paint and *gasp*  painted over the design!


I do want to point you in the right direction (giggle - see what I did there?) and make sure that you are aware of another option.  Eyelet Outlet has these cool enamel arrows that would have been perfect for this project and I probably would have used 2 or 3 - but I didn't have them at hand and I like being able to stretch my supplies. I will add a link to these in the supply list at the bottom of the post!

Arrow Enamel - Mickey Colors

Anyway, I added a small piece from the Pearl Bling Strip and decided my ATC was done!


I created a clean & simple background...


...and voila!   


Hmm - looks like I have some extra ATCs that I have already stamped.  If you leave a comment for me over on my blog, My Time to Play, or my Facebook or Instagram pages, I will draw names and send them out next week.  I would love to see what you create!  (maybe I will have a contest...)

Thanks for stopping by and I hope you find some time to play today!  Susie


Eyelet Outlet Materials:
Cactus Washi Tape
Pearl Bling Strip - 4mm
Vacation Arrow Sign Brads
Arrow Enamel- Mickey Colors

  Other: Stamps, acrylic paint, cardstock, watercolor paper, watercolor paint

Friday, February 16, 2018

Welcome to Phoenix!

Hello and TGIF!  Susie Bentz here and this is my first time hosting the Eyelet Outlet blog. I hope there are some scrapbookers out there because I am sharing a fun and funky grid style page!  I absolutely love this style of scrapping because each little square is an opportunity to play!


My whole page was inspired by this gorgeous, wide Cactus Washi Tape. Water colored images are so popular and this tape nails it - so many gradations of color!  I chose a skinny pink striped washi to coordinate but there are many styles and colors to choose from at Eyelet Outlet!


I started with an 11.75" square of off-white cardstock which I centered on top of 12" black cardstock.  I created the grid with 4mm black Pearl Strips and began to add in the washi tape.  The cactus pattern repeats about every 8 inches so I used one long strip in the title area...


...and then I did a double layer of the tape in this square!  Since the tape is so transparent it was easy to see through it to line it up. The double layer makes those succulents just a little more vibrant!  I couldn't resist adding a little word bubble brad to my photo!


I used a mix of alphas from my stash for the title and then accented it with a camera brad from the Travel Brad set.

And yes, that cactus is wearing a pair of super cute yellow sunglasses!  (The Sunglass Brads pack also includes red, green and blue shades!)  I added a Pink Enamel Heart to the journaling block...


...and to this photo in the upper left.  I love dressing up my pages with all these fun brads, bling, enamel shapes and stickers!


Here are a couple more close ups:


Wide washi tape from Eyelet Outlet makes it very easy to create a totally custom page so check out the selection HERE.

It looks like I will be hosting the blog every Friday afternoon so I will see you next week when I will have a card to share!  Thanks for stopping by and I hope you find some time to play today!
~ Susie

Supplies:
Cactus Washi Tape
Pearl Strips - 4mm
Travel Brads
Sunglass Brads - Color
Saying Bubble Brads
Heart Enamel -Pink

Other:  alphas, stickers, cardstock,  die cuts, flair

 
.

Wednesday, August 30, 2017

Bring On the Bling!

I (Lauren) am still mildly obsessed with all the beautiful glittery *BLING* options available in the Eyelet Outlet store! This time, I've combined some of my favorite shapes with stencils and blendy ink!


For my first card, I used a favorite stencil with a mixture of different sized Maltese crosses. I blended several shades of blue and purple ink, over some designer paper with a subtle "resist" pattern built into it. I added Purple Flower Jewels ringed with Clear Bling to the largest; Single Gems to the smallest, and a mix of Blue Pearls and a few Teardrop Jewels (coming soon the the shop!!!) to the rest.


This lacy, floral stencil was a bit of a challenge, because it wasn't quite large enough to cover the entire panel on the front of my A2 card. So I filled as much of the bottom of the card as I could cover; then moved the stencil up to the top... and covered the seam with Pink Foil TapeGlitter Gold Washi and Long Bling Strips. I scattered a few more Flower Jewels over the design and added bits of a Champagne Bling Swirl that I had snipped apart to make it fit better!


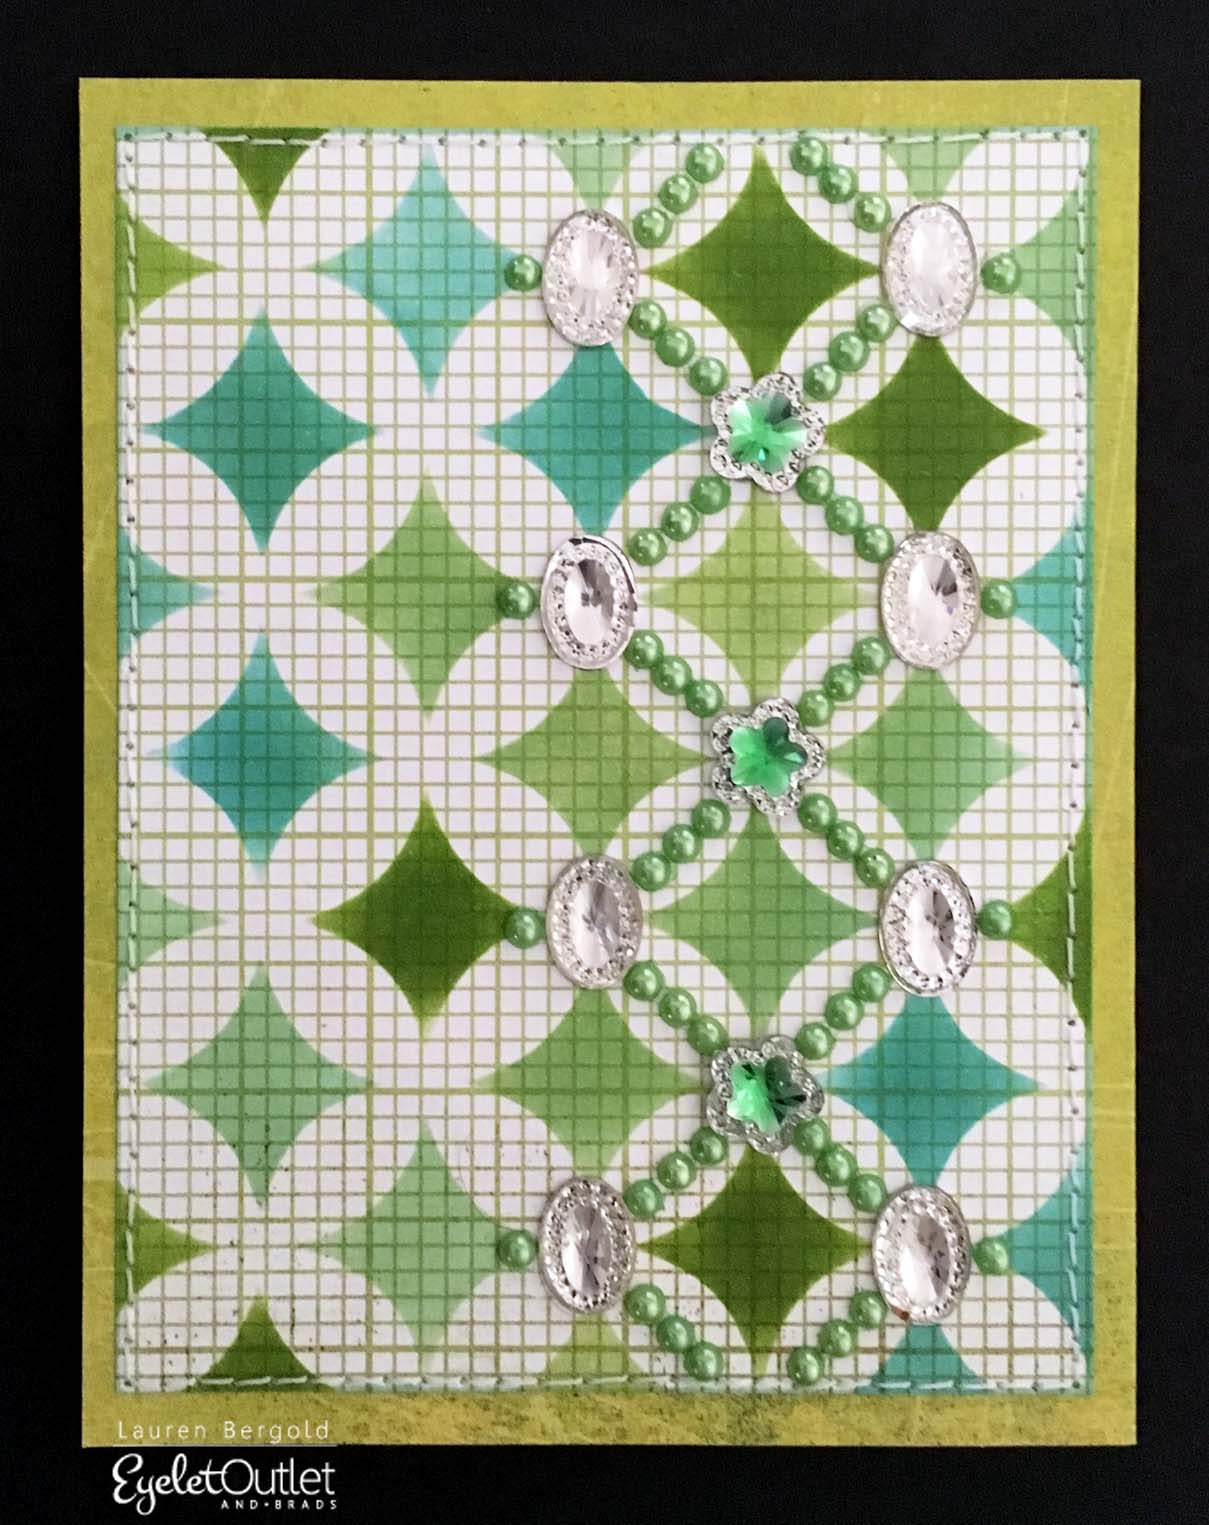
A regular, geometric pattern is often less appealing to me, but as a base for bling, it turned out to be really fun. this time I created my own pattern around the inked diamonds, using Green Flower JewelsClear Oval Gems and snippets of a Green Pearl Strip.


I hope you'll be inspired to combine Eyelet Outlet Bling with some of your favorite stencils, I'd love to see what sorts of designs you can come up with!  


Be sure to tag @EyeletOutlet if you post on social media, and come find us on FaceBook! ♥

is glad that bling comes in
ALL THE COLORS!