Showing posts with label Eyelet Outlet Brads. Show all posts

Sunday, December 22, 2024

Janet's Five Faves of 2024

  It's been quite a year at the Eyelet Outlet blog. We've had some great projects in 2024. This week, the team is taking a look back and showing us their five favorite cards and projects of 2024. I've picked mine but it's always hard to look through over 50 projects and choose your favorites. If you would like to be reminded of how to make these or if you wonder what products were EO's, just clink on the post links and it'll take you to the original posts. So - without further delay, here are my top five favorites of 2024!

This goofy looking snowman is tricked out with many holiday themed brads included a hat, wreath, ornament, and much more!

Skating Snowman


Everyone needs a little encouragement from time to time. This card has a lot of color and patterns for the dresses made with washi tape, hanger brads, and heart pearls.

Hang In There


There are two things I love from the EO store and that's the Girl Gnome Brads and the many Flower Brads. This thank you card also has added color from washi tapes.

Thank You With Girl Gnomes


These mittens are so cute on this card. They're decorated with Retro Christmas Tree Brads, Snowflake Brads, and Holly Brads. Snowflake bling adds a fun touch to the cuffs.

Mitten Magic


This card features many food brads and washi tapes. Looks good enough to eat!

Have an Egg-Cellent Birthday


Thanks for joining me here today to see some of my favorite cards of the past year. I hope you all enjoy a peaceful and restful holiday. Please visit the EO store for all your brads, washi tape, bling and paper flowers!

Happy Creating!


Janet - YouTube - Blog - Facebook - Instagram - Pinterest

Friday, March 10, 2023

A Flamingo Celebration!

Happy Friday, Eyelet Outlet Fans!  I am here today to share a fun, shaker card that I created. 

Are you a fan of flamingos?  When I go to the zoo, I love to watch them as they interact with each other.  They always look so majestic to me as they stand on one leg. 

I colored up this cute flamingo with Copic Markers, cut it out and set it aside before creating my shaker element.  I die-cut several squares from card stock and acetate, adhered them all together and set it aside to dry completely. 
I die-cut the cover panel and adhered a strip of the beautiful flamingo washi as a border across the top.  I thought it would be the perfect backdrop for my sentiment. 
I filled the shaker element with flamingo sequins and adhered it to the front of the card.  I added the flamingo to the top of the shaker, and I added a loopy silver bow that I completed with a flamingo brad.

I think this turned out so fun and will be perfect to send to someone celebrating a special occasion!

I hope you are inspired to get crafty!

Shopping List: 

Thank you so much for hanging out with me! 

Xoxo, Kim


Friday, March 3, 2023

Dreaming of Sand and Surf!

Happy Friday, Eyelet Outlet fans!  I don't know about you, but I am so over winter and I am dreaming of warm beachy days!  I hope they come soon! 

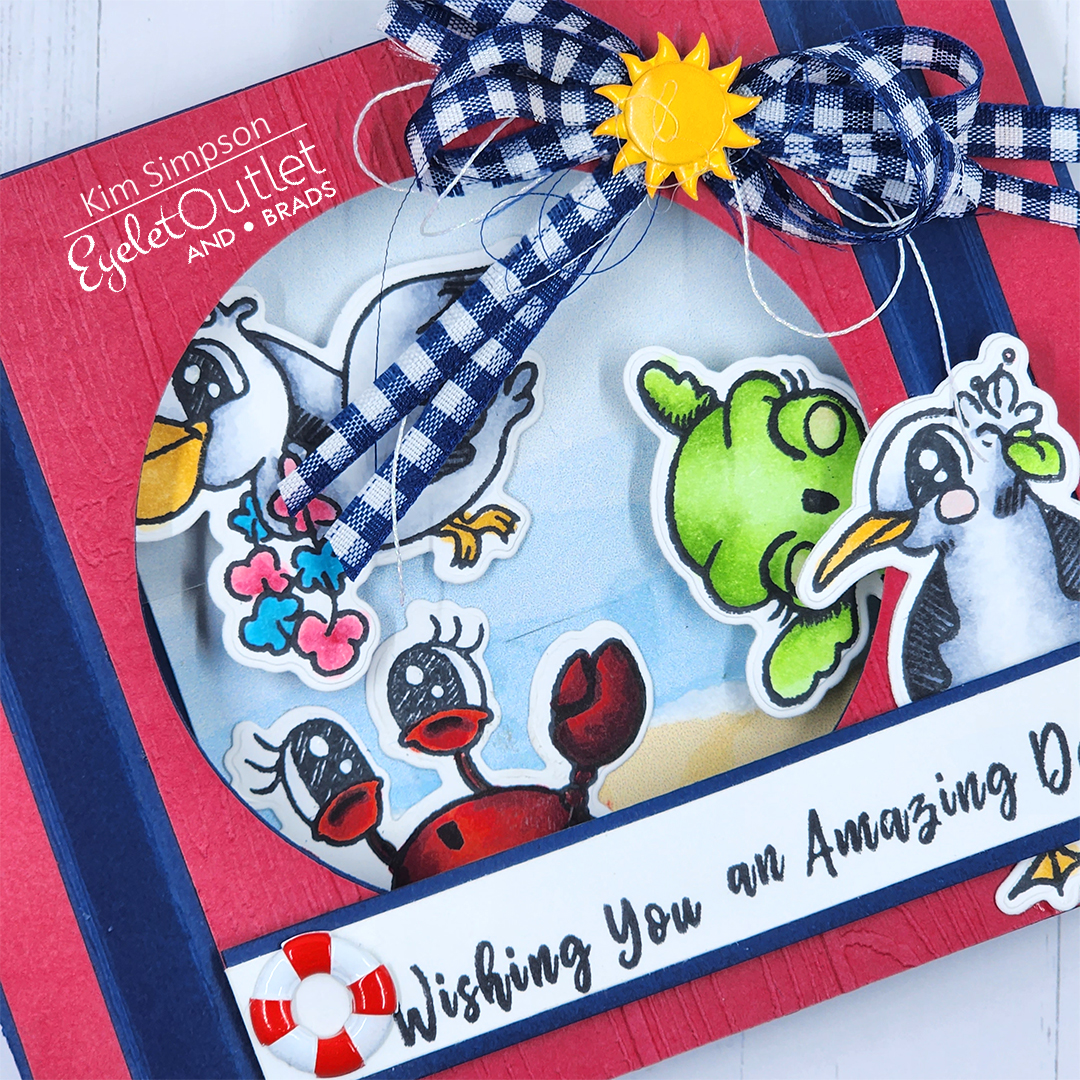
When I saw the new Cruise Ship Brads, I knew that I had the perfect stamp set to pair them with!  I created a fun pop up shadow-box card with a beachy theme!


I created the background by tearing some digital papers that represent the sand, water and sky.  I adhered the images to acetate and added them in various places to add depth to the card. 
Lastly, I created a bow and added the sun brad to the center of it and added the life preserver brad to the sentiment strip.  The card stands on its own and is the cutest little 3-D scene.


I hope you are inspired to get crafty!

Shopping List: 

Thank you so much for hanging out with me! 

Xoxo, Kim


Friday, February 24, 2023

Cowgirl Love

 Happy Friday, friends!  Today, I am sharing a card that I had SO much fun creating!  I recently hosted a Mystery Craft Along with some of my favorite friends, and I taught them a variation on the Twisted Ribbon Technique.  I had so much fun with it, that I wanted to try it with washi tape rather than paper, and this time I used the traditional technique.

I love the Glitter Washi Tapes so much, so I decided to pair the Black and Hot Pink to create the Twisted Ribbon Panel.  I die-cut a black and pink banner and paired it with this adorable cowgirl that I colored with Copic markers.
I die-cut the sentiment from a die in my stash and adhered it to the card front.  To complete my card, I added a silver metallic bow to the hot pink paper flower, and then added one of the beautiful new Rose Brads.

I hope you love this card too!

Shopping List: 

Thank you so much for hanging out with me! 

Xoxo, Kim

Friday, February 17, 2023

Life Can Be Prickly!

 Hi friends!  Have you ever needed an encouragement card and just didn't know what to do?  That was me, until I saw the "coming soon" Cactus Brads!  I knew that I had the perfect stamp set to pair them with. 

I colored the Prickley Pear Cactus Image with Copic markers, die-cut it and set it aside. 
I used the amazing Copper Glitter Washi to cover the edges of a cardstock panel.  You'd never know it, but I just grabbed the first piece of card stock I could find.  It's yellow (haha), but since the washi covers it, it doesn't show.
I layered a piece of digital paper with the washi panel and adhered them to my card base.  I added my focal image to the front of the card.  I embossed the sentiment on a strip of cardstock and added a couple of Cactus Brads before adhering it to the front of the card.  To complete the card, I created a bow and using my glue gun, I glued one of the brads to the center and then to the front of the card. 

I love how this came together!  The brads and the stamp set paired beautifully!

Shopping List: 

Thank you so much for hanging out with me! 

Xoxo, Kim


Friday, February 10, 2023

HBD! Happy Birthday!

Happy Friday, crafty friends!  I am still working on building my stash of birthday cards, and it is so fun and easy to do using brads, as there are endless possibilities!  

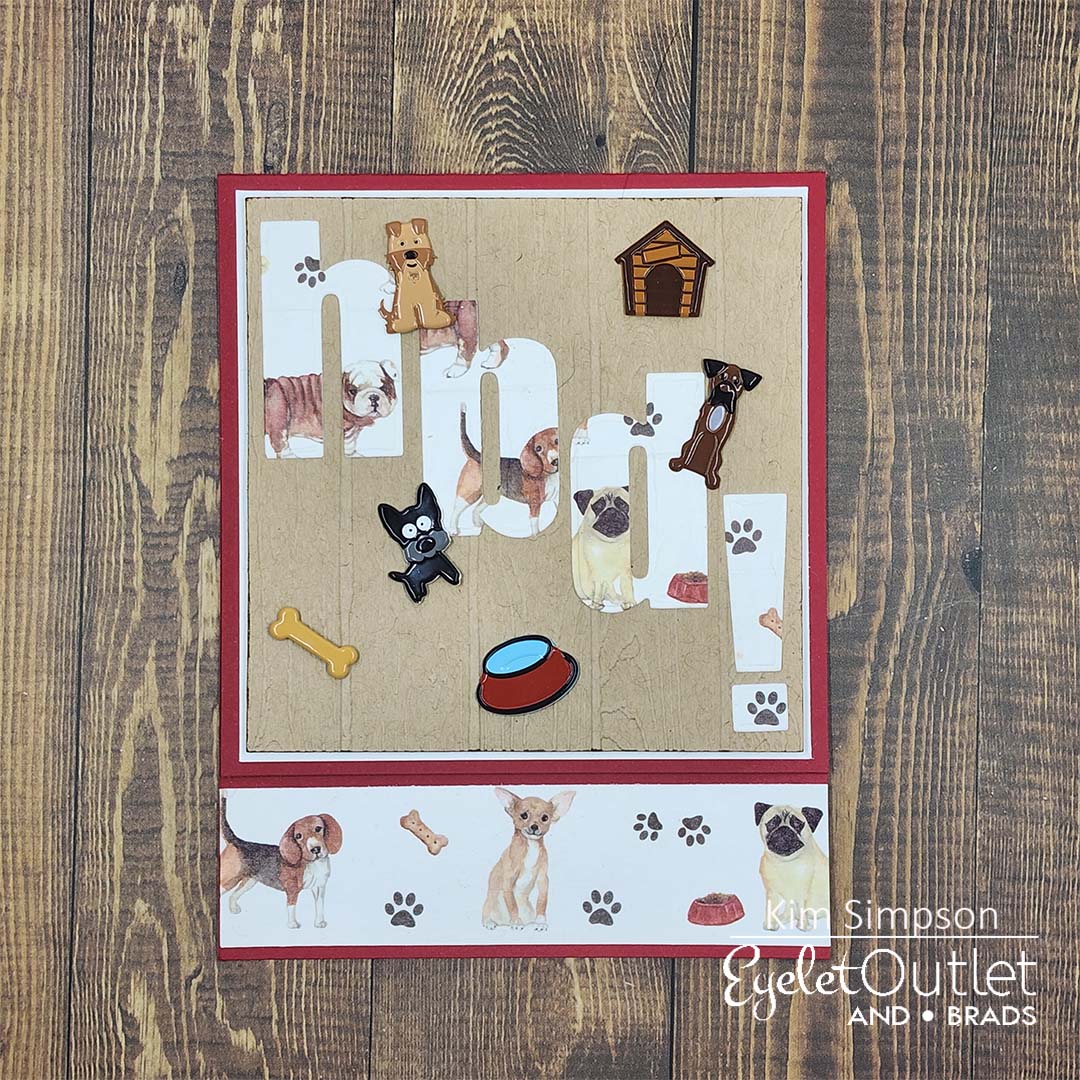
I have so many dog lovers in my life, so I made a card for one of them.  I started by wrapping a strip of white card stock with Dog Washi Tape.  I trimmed the front of my card base down and adhered the washi panel to the inside of the card base.  This allows the dogs to show on the front of the card when it is closed, and on the inside panel.

I wrapped another panel of white card stock with the washi tape and I die-cut the letters "h, b, d, and !" from that panel.  I adhered the HBD diagonally to a wood-grain kraft panel.   I embellished the panel with several of the Puppy Brads and Kennel Mix Brads before adhering to the card front.

I hope you are inspired to create something today!  This card was really a lot of fun to make! 

Shopping List: 

Thank you so much for hanging out with me! 

Xoxo, Kim

Kim - Blog - Facebook - Instagram


Friday, February 3, 2023

For My Favorite Handyman!

 Happy Friday, friends!  Are masculine cards a struggle for you?  They sure are for me, and I never seem to have enough birthday cards for the guys in my life!  I created a super fun birthday card for my favorite handyman.  

I started by creating a background panel by alternating the Tool Washi Tape with strips of card stock that I die-cut.  I created my focal point by adding a large die-cut birthday sentiment to a piece of craft cardstock.  

Before adhering the panels to the card base, I added screw dies to each corner of the washi panel, and I used some toolbox and tool dies on the sentiment panel.  I then popped them up on the card base with foam dots.
Shopping List: 

Thank you so much for hanging out with me! 

Xoxo, Kim

Kim - Blog - Facebook - Instagram