Showing posts with label Dot Washi Tape. Show all posts

Sunday, December 29, 2024

Bless This Kitchen


The madness of Christmas is past and I feel like it's time to hunker down at home to cocoon a little. In my house, that always means some cleaning and cooking some of our favorite foods! I'm also always in need of some all occasion cards that I can use to send hellos or thank you notes. The card I've made today is perfect for that and it gives you the warm and fuzzies - or at least it does me. 

This is super easy to make with a pre-printed tag and some EO washi tapes and brads. I extended a tag I had in my stash with a few strips of Dot Washi Tape. The extension gave me a place to build my scene with two Canister Brads, a spoon from Baking Brads, and a pot and mitt from the Cooking Brads. The background was made with three other washi tapes as listed below. The blue borders were something I've had in my stash for a long time so I was glad to find a good use for them. Finally, I added a mat behind the tag and the main polka dot panel and boom! Card done! Gotta love it when a simple card comes together.

SHOPPING LIST:

Thanks for joining me here today to see some of my favorite cards of the past year. I hope you all enjoy a peaceful and restful holiday. Please visit the EO store for all your brads, washi tape, bling and paper flowers!

Happy Creating!


Janet YouTube - Blog - Facebook - Instagram - Pinterest

Sunday, March 17, 2024

Retro Polaroid Camera Birthday Card


 Remember the good old 70's when the instant Polaroid Camera was all the rage? I was a child but child or not, everyone found it magical and fun. The pictures weren't that great but hey, it was the joy in watching the photo develop in front of your eyes that never grew old!

My card is an homage to the polaroid camera. It's a birthday card for people of a certain age. That would be me and others older than me I suppose. This was super fun to design. I used Star Brads and the cameras from the Travel Brads. I also used a single clear stippled jewel brad for the camera button. The polka dot border is Green Dot Washi Tape. It turned out so cute! 

Shopping List:

Thanks for joining me here today at the EO blog. Please visit the store for all your brads, washi tape, bling and paper flowers!

Happy Creating!


Janet YouTube - Blog - Facebook - Instagram - Pinterest  

Sunday, February 25, 2024

Enjoy Your Day!


 Hello everyone! I always enjoy decorating clothing items with Eyelet Outlet brads and bling. It often is just the right size for various clothing dies. Whether it's an apron, t-shirt, or sweatshirt, brads like the PiƱata look great on them. 

I made this card by cutting out a stitched scalloped rectangle. Then I cut a window and cut a smaller navy rectangle from a nested set. The green polka dot frame is actually Green Dot Washi Tape. I placed the tape so that it would border the two rectangles. I then went about making the sweatshirt. I covered a piece of white cardstock with Pink Checked Washi Tape. I cut it out with the die and pieced it together. I added a Pinata Brad and two pieces of red sticky back Heart Pearls. I mounted the sweatshirt on the card with foam tape. I stamped ENJOY and heat embossed it. A Heart Brad was placed and then I mounted it with foam tape. I stamped the two other sentiments on white cardstock and placed them. Finally I used three pearls in the Pearl Strip Bling on the left corner. This made a super cute card with lots of movement and texture.  

SHOPPING LIST:

Thanks for joining me here today at the EO blog. Please visit the store for all your brads, washi tape, bling and paper flowers!

Happy Creating!


Janet YouTube - Blog - Facebook - Instagram - Pinterest  

Monday, November 27, 2023

Gnome Me., Love Me


We like Gnomes at Eyelet Outlet. We have lots of brads and 
washi tape for them. This image is from Garden Gnomes Digital stamps
 and was colored with Copic Markers

I used two strips of washi at the botton and added two cute
gnome brads from Eyelet Outlet. The package comes in several color.
 In his little basket are several stitched flower and leaf brads.

Finally I added some blue bumpy dots from
Eyelet Outlet to finish this card up.
I really do like gnomes and have a large garden with about
50 houses for the gnomes to live. Peter Rabbit lives there
also with a very extensive garden.

See you next Monday as we get into some holiday cards.

Your shopping list at Eyelet Outlet
Gnome Brads 2
Stitched Flower Brads Fall
Leaf Brads
Dot Washi Tape Multi Color
Blue Bumpy Gems


Elizabeth - Blog


Tuesday, March 5, 2019

Concentration Card Kit

Hi!  It's Kim from Katydid Cards and today I'm sharing the final card kit being offered by Eyelet Outlet at trade shows.  This kit is a humorous adaptation of that old TV game show, "Concentration".   Here's a look at each of the cards provided in the kit.


Here's a more in-depth version of the tutorial with step by step pictures just in case you had any additional questions

First, you'll cover the nine white squares with your favorite Washi Tape.


Fold the excess washi over the edges of the square or trim it off scissors.  Note:  If you find it easier, you can use a small circle punch to trim the notch.


To ensure good adhesion, burnish the washi tape with a bone folder or your thumb.


Attach the washi covered squares to the card flaps. Align the tops with the score lines on the flaps, being sure the notch is to the bottom.  After you attach each one, check to be sure the flap opens properly.  If not, carefully remove it and reapply.


Attach the white panel with the emotion words to the reverse of the card front. There are faint lines on the panel to help you with placement.  We applied adhesive to the front edges of the white panel and to the back of the card front around the flaps to make sure it’s attached well.


Insert the Emotion Brads on the white panel, making sure they coincide with the words. Note:  We use a paper piercer to make the hole and then insert the brad.


After it’s inserted, we flip to the back of the panel to flatten the prongs.


Attach the rectangle that matches the color of the card base over the back of the panel to hide the prongs.


Next, attach the yellow mats to the front of the card. On our card, we attached the large bottom mat directly to the card front and the small top mat with pop dots.  The mats can be attached either way, it’s your personal preference.


Attach the printed greetings, centered on the yellow mats. On our card, we attached the large bottom greeting with pop dots and the small top greeting directly on the mat.  As with the mats, the sentiments can be attached either way.


Decorate the white sentiment panel with washi tape and attach to the inside of the card.


With your left-over Washi Tape, why not take a minute to decorate the envelope flap.
And finally, here's a picture of each card individually.


I hope you enjoyed seeing how these kits go together and are inspired to get some for yourself at the trade show you visit.


Kim from Katydid Cards
Who provided the inspiration for these cards?  Katy did!

Tuesday, March 27, 2018

Night Shift

Hi folks!  It's Kim from Katydid Cards

Have you ever counted sheep to lull yourself to sleep?  I've never tried it, but I know if I did it would devolve into an overly complicated task of making sure the sheep are evenly spaced and jumping at the same height while redesigning the fence and pondering why the grass hasn't been mowed.  That gives you some small insight into why I don't sleep at night.

But here's a gent who employs the counting sheep method to a successful conclusion; for himself anyway.  The sheep aren't all that thrilled about being on the night shift, however.


 To make this card, I used the adorable Pig & Sheep Brads.  The wallpaper is Wide Dot Washi Tape and, as with all finely appointed bedrooms, the bedspread is covered in the coordinating Dot Washi Tape.  The floor is Hardwood Washi Tape and the finials and feet on the bed are Pearl Bling, colored with Copic markers.  And here's a closer look at those sheep.


This card is called a Bridge Fold.  Easy to make, but looks great!  Here's a look down from the top so you can see the fold from another angle.


The back of the card is the perfect spot for the sentiment and another opportunity to use a brad to accent.


I don't know if you caught my post last week using the Pig brad from this pack.  If not, here it is.


Kim from Katydid Cards
Who provided the inspiration for these cards?  Katy did!

Tuesday, February 6, 2018

Concentration

Hi!  It's Kim from Katydid Cards!  I'm thrilled to be continuing with the Eyelet Outlet design team for another term, but I'm going to be posting on Tuesdays rather than Saturdays. 

I participate in several blog hops on my personal blog.  As they occur over the weekend, my Saturday post overlapped.  This way my Eyelet Outlet gets all the attention it deserves...or maybe, given the name of this post, I should say concentration! 

When I saw these Emotion Brads in the Eyelet Outlet store, I had what I hoped would be a great idea for a card.  Check out these cuties:


 I paired them with the Dot Washi Tape.


I don't know if you remember the old game show, Concentration, but I loved that show!  My card is based on all those enjoyable hours I spent watching and trying to solve the puzzle before the contestants.


I cut the little flaps on a 4 1/4" x 5 1/2" panel of cardstock and then covered each of them with the Dot Washi.  Under the flaps are the Emotion Brads with their little captions.


Inside, I had a bit of fun with the sentiment.  I'm hoping it's the last thing the recipient expects after I was extolling the virtues of memory games on the front...and it makes them smile.


I hope this made you smile, too. 


Kim from Katydid Cards
Who provided the inspiration for these cards?  Katy did!

Wednesday, January 10, 2018

Totally Do-NUTS About You!

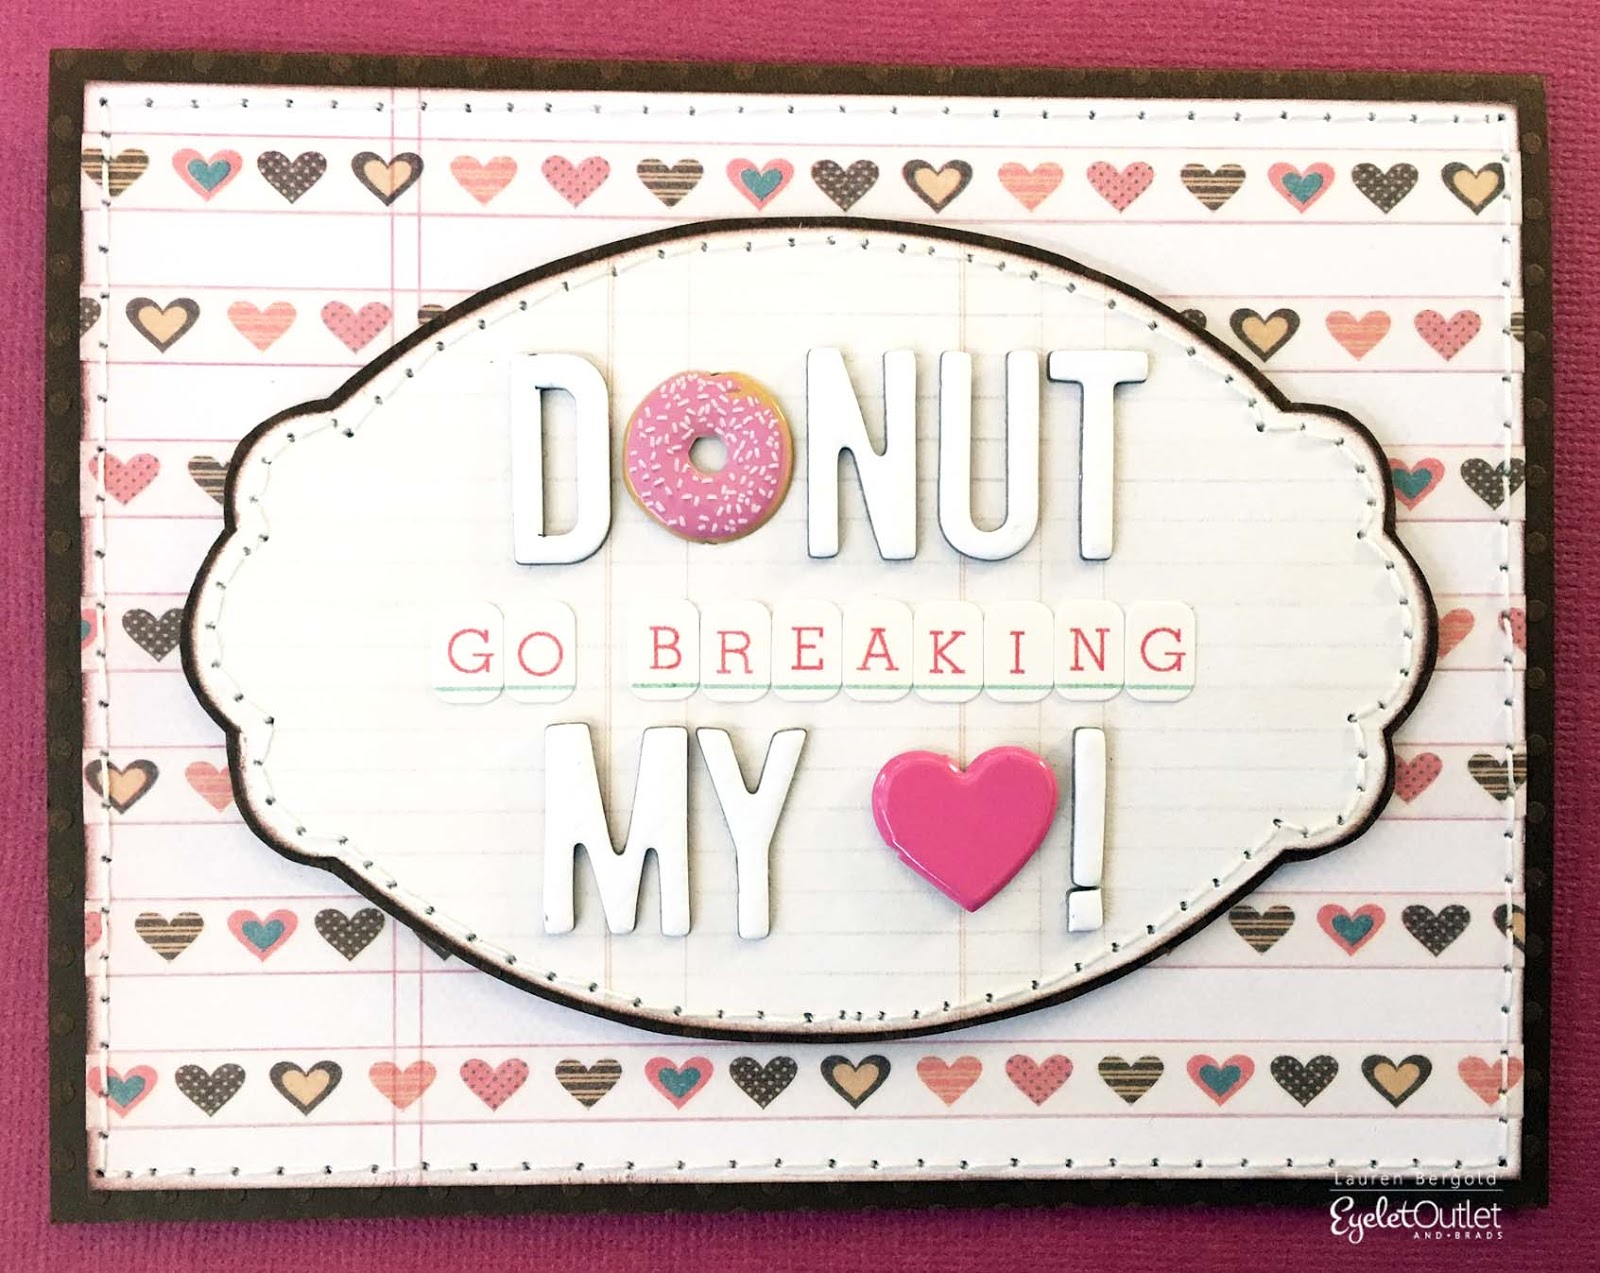
Let's face it, doughnuts are awesome. In real life, they're not something most of us can have in unlimited quantities, which is why I (Lauren) am always thrilled to break out the Eyelet Outlet Doughnut Brads: they're fat-free, calorie-free, and full of cardmaking possibilities!


Since we're in the middle of January, I think we're all sort of in Valentine mode, so I've made three cards that would work perfectly for the holiday, but aren't too specifically Valentine-ish. Because it's nice to have choices, right? The first one actually has hearts on it, but that was mostly because I love the colors of this Skinny Heart Tape with the Doughnut Brad that I've swapped in for the "O". I swapped a Heart Brad for the entire word "heart", as well, which makes my sentiment fit really nicely inside the label shape. I'm always on the lookout for papers with strong, straight horizontal lines in them. Ledger and notebook patterns not only look great, they're a great helping hand for placing my tape stripes neatly in the background!


One of the reasons I chose this colorful Dot Washi Tape is that it kind of reminded me of rainbow sprinkles, which are awesome with Doughnut Brads, don't you think? I made my background patterned paper by neatly lining up strips of the tape on a piece of plain white cardstock that I'd cut down to fit perfectly on my A2 card front. This time I moved the sentiment panel off to the right side of the card, but balanced it out by placing the letters towards the left side of the label.


I love pastel pink as much (or MORE, lol!) as anyone I know, but for my third card I chose to celebrate the chocolate Doughnut Brad. I made a background panel from Pink and White Dot Foil Tape, which I revealed unevenly by tearing some dark brown dotted cardstock... a bit like peeling the wrapper of a candy bar! I composed my sentiment with oversized vinyl letters and trimmed-down Dymo labels; and added a few strips of Skinny Brown Glitter Tape just behind the word "donut" for even more emphasis.


I hope your day has included both creativity and treats... the Eyelet Outlet Store is a pretty good place to find both of those! ♥

enjoys the occasional donut,
don't you?