Here's a more in-depth version of the tutorial with step by step pictures just in case you had any additional questions
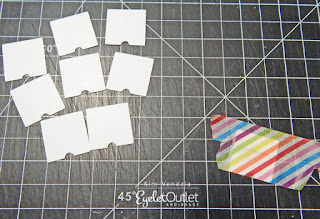
First, you'll cover the nine white squares with your favorite Washi Tape.
Fold the excess washi over the edges of the square or trim it off scissors. Note: If you find it easier, you can use a small circle punch to trim the notch.
To ensure good adhesion, burnish the washi tape with a bone folder or your thumb.
Attach the washi covered squares to the card flaps. Align the tops with the score lines on the flaps, being sure the notch is to the bottom. After you attach each one, check to be sure the flap opens properly. If not, carefully remove it and reapply.
Attach the white panel with the emotion words to the reverse of the card front. There are faint lines on the panel to help you with placement. We applied adhesive to the front edges of the white panel and to the back of the card front around the flaps to make sure it’s attached well.
Insert the Emotion Brads on the white panel, making sure they coincide with the words. Note: We use a paper piercer to make the hole and then insert the brad.
After it’s inserted, we flip to the back of the panel to flatten the prongs.
Attach the rectangle that matches the color of the card base over the back of the panel to hide the prongs.
Next, attach the yellow mats to the front of the card. On our card, we attached the large bottom mat directly to the card front and the small top mat with pop dots. The mats can be attached either way, it’s your personal preference.
Attach the printed greetings, centered on the yellow mats. On our card, we attached the large bottom greeting with pop dots and the small top greeting directly on the mat. As with the mats, the sentiments can be attached either way.
Decorate the white sentiment panel with washi tape and attach to the inside of the card.
With your left-over Washi Tape, why not take a minute to decorate the envelope flap.
And finally, here's a picture of each card individually.
I hope you enjoyed seeing how these kits go together and are inspired to get some for yourself at the trade show you visit.
Kim from Katydid Cards
Who provided the inspiration for these cards? Katy did!


No comments:
Post a Comment