Showing posts with label Orange Pearl Bling. Show all posts

Sunday, November 23, 2025

Let's Talk Turkey!


 Hi everyone! It's almost time to Talk Turkey!

These two birds are trying their best to blend into the Thanksgiving table without giving away that their true identity! I love the look on those faces made possible with Small Eye Brads. Read the caption and you'll know why they look a little bug eyed!

I wanted to add feathers to one of these turkeys and I found the perfect solution in EO's Pastel Leaf Brads. You never know how your brads can be reimagined. 

Utensil Brads are placed near the caption and I used Orange Pearl Bling to further decorate this card. I think it'll bring a little mirth into Thanksgiving Day!

Shopping List:

 Thanks for joining me here today and please visit the EO store for all your brads, washi tape, bling and paper flowers!


Happy Creating!

Sunday, March 24, 2024

A Zesty Birthday!


I'm a fan of citrus used on a card so I was thrilled when Eyelet Outlet released their Lemonade and Fruit Slices brads last year. It has a lemonade pitcher and wedges of oranges, lemons, and limes. Recently I came across a stamp set that featured an orange so I had to purchase it knowing it would be perfect for several EO brads. 

To make this A2 card, I started by inking and blending the orange background on watercolor paper. Once dry, I cut it out with a die. I stamped and colored the balloons and orange. I also stamped the sentiment on the bottom and cut out the Happy Birthday words in pearlized white cardstock. I added two bright Balloon Brads to the balloon cluster and added the glasses, hat brads and pearl bling to the orange. I used orange and green chalk on the orange as well. The I put all the pieces on the card and added the Orange wedges from the Lemonade and Fruit Brad set. Finally I added the orange Jewel Strip Bling. The result is a card that is good for the young or old, female or male and it makes me smile. It's perfect as an add to my stash for future use.


Thanks for joining me here today at the EO blog. Please visit the store for all your brads, washi tape, bling and paper flowers!

Happy Creating!


Janet YouTube - Blog - Facebook - Instagram - Pinterest  


Saturday, November 18, 2023

Hello Pumpkin!

So, over the last few weeks, I’ve been creating a bunch of Thanksgiving table decorations, but the table isn’t the only place you can decorate.  I went through my stash of wood shapes and found this cute pumpkin and knew I must transform it to become part of this year’s holiday celebration!

I painted the base white and then lined it with some pumpkin washi tape. I realized that it was discontinued after I finished making it so I do not have a link to share...sorry :(  But there are so many other cute Washi Tapes to choose from, you won't even miss it.  I then placed some matching orange cardstock in the middle so my saying would pop.

To create the words “Hello Pumpkin”, I lined a piece of paper with the Black and White Dots Washi Tape and then used some dies to cut out the letters and place them on the pumpkin. How cool is that?!?! Die cutting washi tape!!! Just think of the possibilities.

I finished my pumpkin off with some Orange Pearl Bling, Orange Jewel Bling for the outline, and three of the Pumpkin brads. I added a paper twine ribbon so I can hang this cutie up!  I think I’m going to be hanging it up on the outside of my craft room door.

Thank you Eyelet Outlet for helping me transform a plain wooden pumpkin into this cute Thanksgiving decoration.

Supplies Used

Have a wonderful week and always be STRATE-UP CRAFTY!

💗Stacy


Sunday, October 8, 2023

Go Vegan for Thanksgiving!


Fall is going fast and it'll soon be time to think about the menu for the annual Thanksgiving Feast. Of course, what is Thanksgiving without the turkey! Today's turkey is doing his best to get uninvited to the day where he's normally the star of the show!

This little vegan is surrounded by Mini and Leaf Brads and Orange Pearl Brads. He is standing on a strip of Pumpkin Washi Tape which holds the new Acorn & Squirrel Brads. Also included are a Sunflower Brad and a Pumpkin Brad.


Thanks for stopping by today. Please visit the store for all your brads, washi tape, bling and paper flowers!

Happy Creating Everyone!


Janet YouTube - Blog - Facebook - Instagram - Pinterest 

Saturday, September 10, 2022

It's All About The Details


Hello Eyelet Outlet Crafters!  Did you know that in United States the custom of kids trick or treating didn't start until the 1930's and 40's?  Kids were given homemade treats, such as popcorn balls, cookies, cake.  Halloween candy became commercialized in the 1970's and just this  last October in 2021, the candy sales reached the highest ever at 10 billion dollars! I decided to go old school this year and I am going to make homemade treats for my neighbors. Today I am sharing with you one of the several Popcorn treat boxes that I made using Doodle bug papers Fright Night collection. This fun popcorn box cut-file was easy to cut out on my Cricut and fast to assemble with a little folding, scoring and some glue. The best part of making crafts is decorating in my opinion. I used some of EO's Yellow Enamel dots and   Multi- Size Orange Pearl Bling. I also removed some of the purple pearl flat backs of the Purple Pearl Strips and glued them on to my popcorn box. I also created a little card/tag and added one of EO's 1/16" Tiny white eyelets to not only strengthen the tag but it added that extra special touch to make this popcorn box spooky cute. Lastly, I  embellished the box with a cute Doodle bug skull  sticker and glued on some kooky little googly eyes. 

If you would like to see the walk-thru video of my Popcorn Box Project plus a few other boxes and gift bags with bag toppers the video link is Below:


Thank you for stopping by today! Please visit the store for all your Brads, Washi Tape, 
Bling, and paper flowers!

Happy Crafting!


Saturday, May 14, 2022

CAS Fun and Quirky Birthday Card!

Hey everybody! Don't you just love fun quirky birthday cards that are easy?! Leslie here sharing a fun birthday card featuring our Party Hat Brads, Orange Dot Washi Tape and Orange Pearl Bling! These party hats are such a hoot and so much fun to play with!

I cut a standard A2 size top-folding card base from heavyweight white cardstock along with a layering panel from a lighter weight white cardstock. I applied a single strip of Orange Dot Washi Tape and then adhered a narrow strip of bright yellow cardstock just above it. I added four Party Hat Brads in a row and adhered the panel to the card base. I stamped a birthday sentiment in black ink on a scrap of white cardstock, cut it with a sentiment strip die, and layered it once more on another piece of the scrap cardstock before adhering it to the card front on an adhesive foam strip. The finishing touch was adding Orange Pearl Bling.


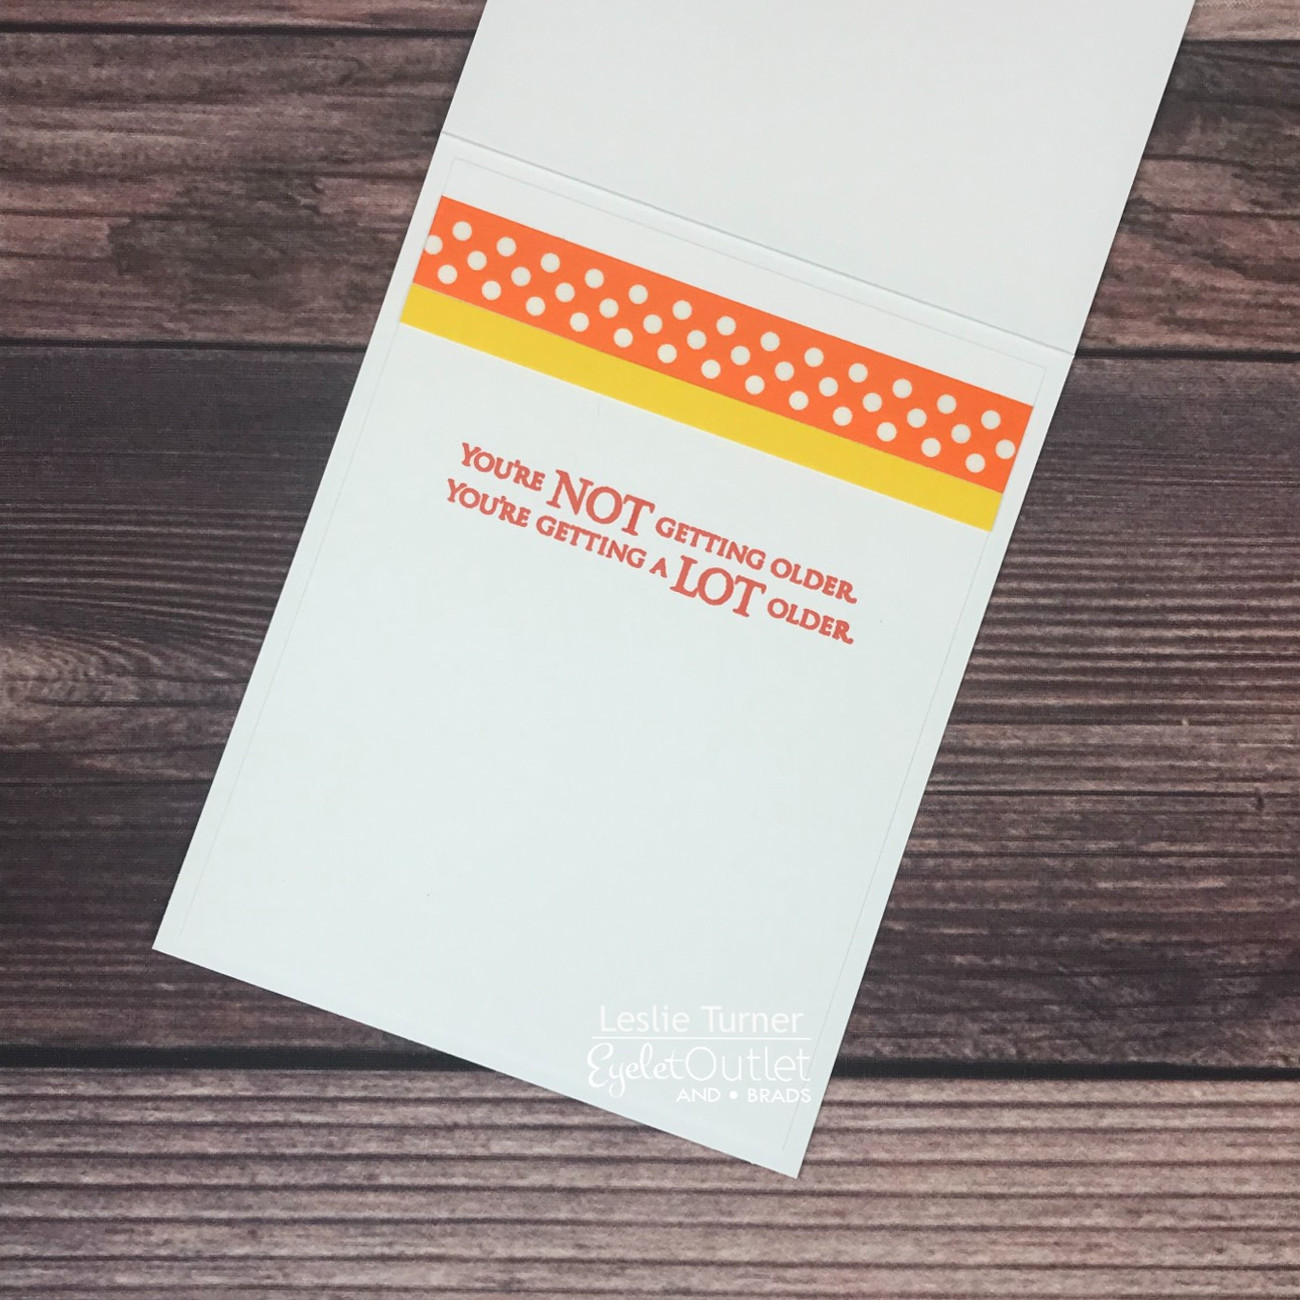
I cut the inside panel from white cardstock and embellished it with a strip of Orange Dot Washi Tape and a narrow strip of the bright yellow cardstock. I stamped a fun sentiment in orange ink and adhered the panel directly to the card base. 

Thanks so much for stopping by today - we'll see you next time!


Leslie Turner
Blog / Facebook / Instagram / Pinterest / Twitter

Saturday, January 15, 2022

I do, I do! I absolutely love Fall!

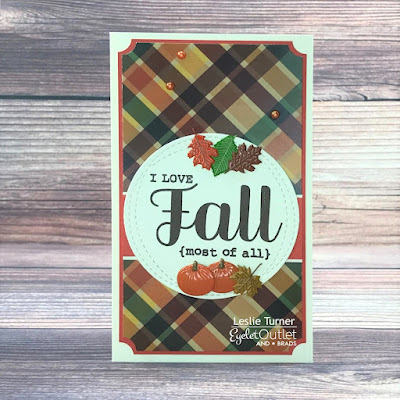
Hey everybody! I hope you've had a great week! Leslie here, sharing a pretty Fall card! This card features our Pumpkin Brads, Leaf Brads and Orange Pearl Bling! I got some new double-sided patterned paper packs that I've been itching to use, plus, if you know me very well, then you know that I typically don't stick to seasonal crafting... I'm all over the place and create whatever pops into my head! It's Winter, so what's wrong with a Fall card, I ask?! ;)

I cut a side-folding mini slim card base from ivory cardstock along with layering panels from orange cardstock and patterned paper. I used a corner punch on the two layering panels and adhered them together. I cut wide embellishing strips from the ivory and orange cardstock, layered them together and adhered them horizontally across the front of the card, and adhered the panel to the card front. I die cut a circular element for the front on which I stamped the sentiment in brown ink, added Pumpkin Brads and Leaf Brads, and adhered it to the card front. To finish it off, I added some Orange Pearl Bling


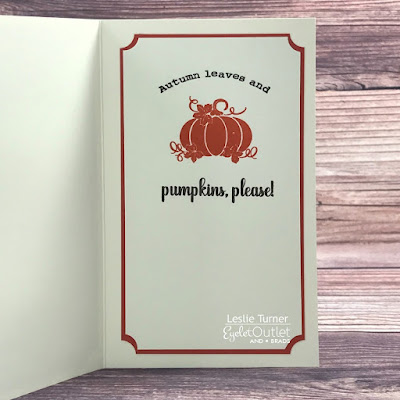
I cut the inside panel from ivory cardstock and punched the corners with the corner punch. I stamped the sentiment in brown and orange inks, and layered the panel on orange cardstock.


Thanks so much for stopping by today - we'll see you next time!


Leslie Turner
Blog / Facebook / Instagram / Pinterest / Twitter