Showing posts with label color wheel washi tape. Show all posts

Monday, July 3, 2023

Topiary Thoughts


I love topiaries and came across this stamp recently that I have had
for a very long time. It provided many opportunities to use
Eyelet Outlet embellishments to make it special.

It is always a bit tricky to cover a stairstep card but using washi tape
from Eyelet Outlet made it quick and easy. The washi tapes
they have are available for any season.

For the brads, I used the corner butterflies and a bird on the 
topiary container. All the coloring was done with Copic Markers
and the flowers were adorned with clear jewel bling.

For the steps I added a sentiment then adorned the other steps 
with pink enamel dots and clear jewel bling.


I am looking forward to seeing you again next Monday


Elizabeth - Blog

Monday, April 3, 2023

Easter Egg and Chicks


This is a colorful Easter egg that I die cut and then used
pastel brads from Eyelet Outlet for the center of the 
flowers.  I have been waiting to use the cute yellow chick
brads that come in two shapes to accent this egg.
I think they are adorable.

Of course, I love the washi tape from Eyelet Outlet and 
frequently use it as borders on my cards. I finished off the card
with some blue strip jewels. Be sure to check out the shopping
list (below) of the Eyelet Outlet items used in this project.

Shopping List for Eyelet Outlet

See you again next week.


Elizabeth - Blog

Sunday, May 15, 2022

Happy You're My Friend

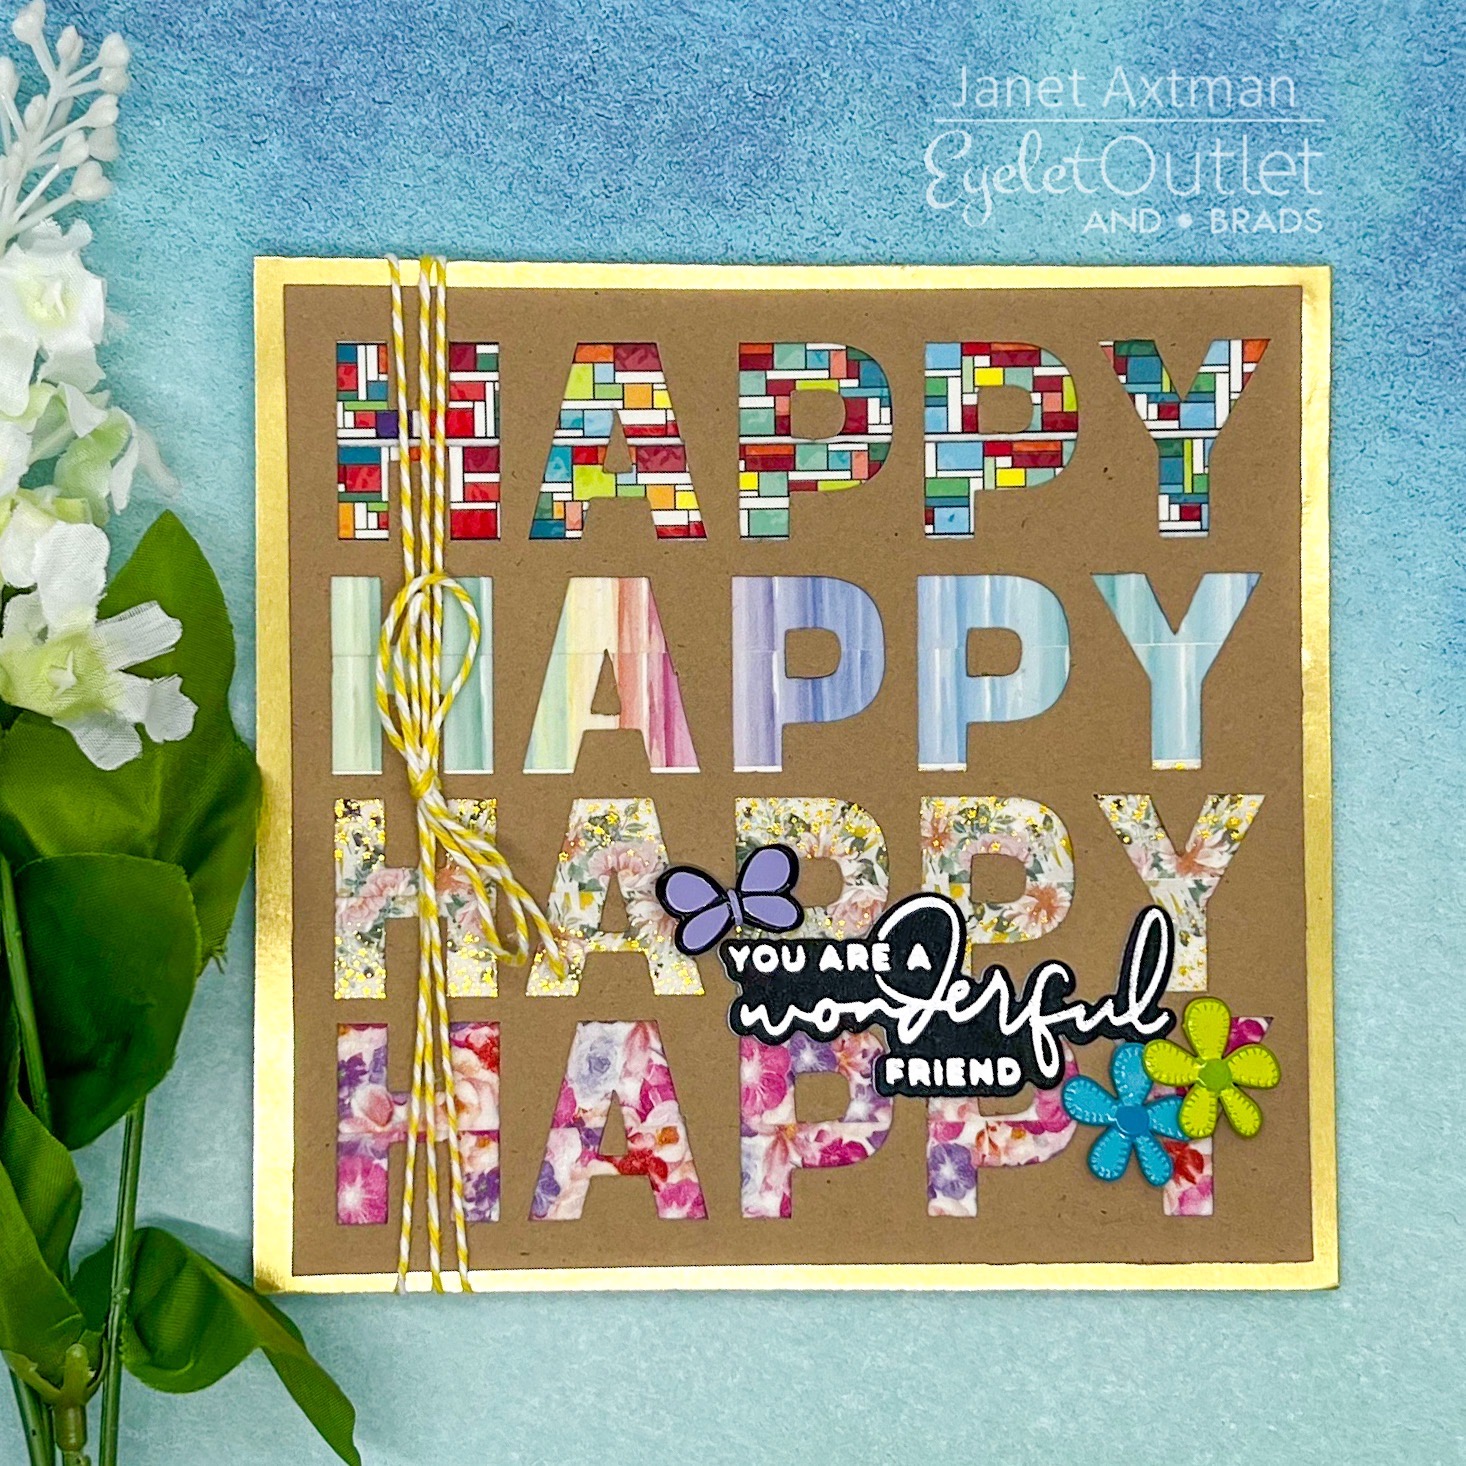
Hello everyone! It's Janet here sharing a fun and quick way to use your favorite washi tapes. I know we hear sometimes that people love to buy washi but they don't know what to do with it once it arrives. While we love collecting pretty things, I hope this will give you an idea to use washi tape in a card to create colorful words.

Steps To Create This Card:

  1. Cut a 5 x 5 1/4 piece of kraft cardstock.
  2. Use dies or your cutting machine to cut four simple words such as Happy that I used here.
  3. Cut a slightly smaller piece of white cardstock and apply two strips of washi tape behind each word
  4. Glue the white cardstock behind the words. If you want, you can also glue in the centers of the letters such as the P and A. That's totally optional.
  5. Choose a sentiment to use. I made mine using the Spellbinders Glimmer machine and silver foil. You can use anything you want. You do you!
  6. Choose some brads to embellish the sentiment. I used Stitched Flowers Brads Bright and a Butterfly Bright brad.
  7. Cut a piece of gold metallic cardstock at 5 1/4 x 5 1/2. Glue the front panel on top.
  8. Wrap twine around the panel three times and tie a bow in the middle.
  9. Cut a base card out of white that is 11" x 5 1/4" Fold in half.
  10. Use adhesive to glue the finished card front to the base card.
I love the washi tape I used on this card. See below for a linked list of products I used.

Shopping List:


Thanks for stopping by today. Please visit the store for all you brad washi tape, bling and paper flowers!

Happy Creating Everyone!


Janet YouTube - Blog - Facebook - Instagram - Pinterest

Sunday, February 27, 2022

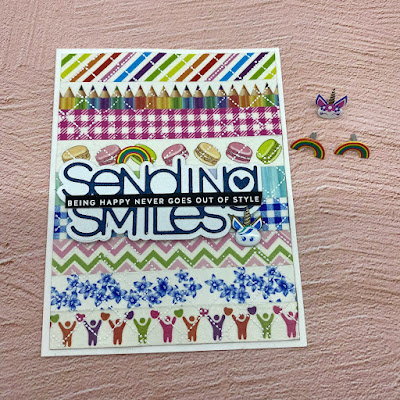
Heat Embossed Washi Tape Panel - Sending Smiles!

Hi everyone! It's Janet here with a bright and colorful card. This one has a background of washi tape in many styles and colors. Check out the shopping list for your favorite patterns. I decided to heat emboss a white diamond pattern over the entire panel and to my delight, it worked very well. I will say the panel initially warped from the heat but I applied an adhesive sheet behind the panel and attached to another piece of cardstock. This controlled the warping perfectly. 

On top of this card, I added a fun die cut and strip sentiment. I couldn't help but add a unicorn and rainbow from the Unicorn & Rainbow Brads.


Thanks much for stopping by. Please stop by the store and check out the amazing inventory of washi tapes.

Happy Creating Everyone!


Janet YouTube - Blog - Facebook - Instagram - Pinterest

Wednesday, August 18, 2021

Summer Vibes

Summer in New Jersey can be pretty hot and very humid, but it's still my (Lauren's) favorite season, and here's a card that celebrates some of my favorite summer treats, in Eyelet Outlet Brad form! 

I used a favorite set of bold alphabet stencils and six sizzling shades of Distress Ink (Worn Lipstick, Mermaid Lagoon, Spiced Marmalade, Tumbled Glass, Mustard Seed and Twisted Citron to be precise) to write the word, "Summer" across my slimline-sized panel. I matted the whole thing on a piece of white cardstock covered in strips of Color Wheel Washi, then added a nice selection of brads, including: Beach UmbrellaFlip Flop BradsMini LadybugCocktail BradsMini EmotionTall PalmSandcastleFlamingoColored Daisy BradsMini BeesIce CreamSun and Pastel Sunglass Brads. I hope whatever your favorite Summer Vibes might be, that you'll enjoy a few of them today!

would not mind an ice cream 
cone right now! 

Sunday, August 16, 2020

Gnome-y Business

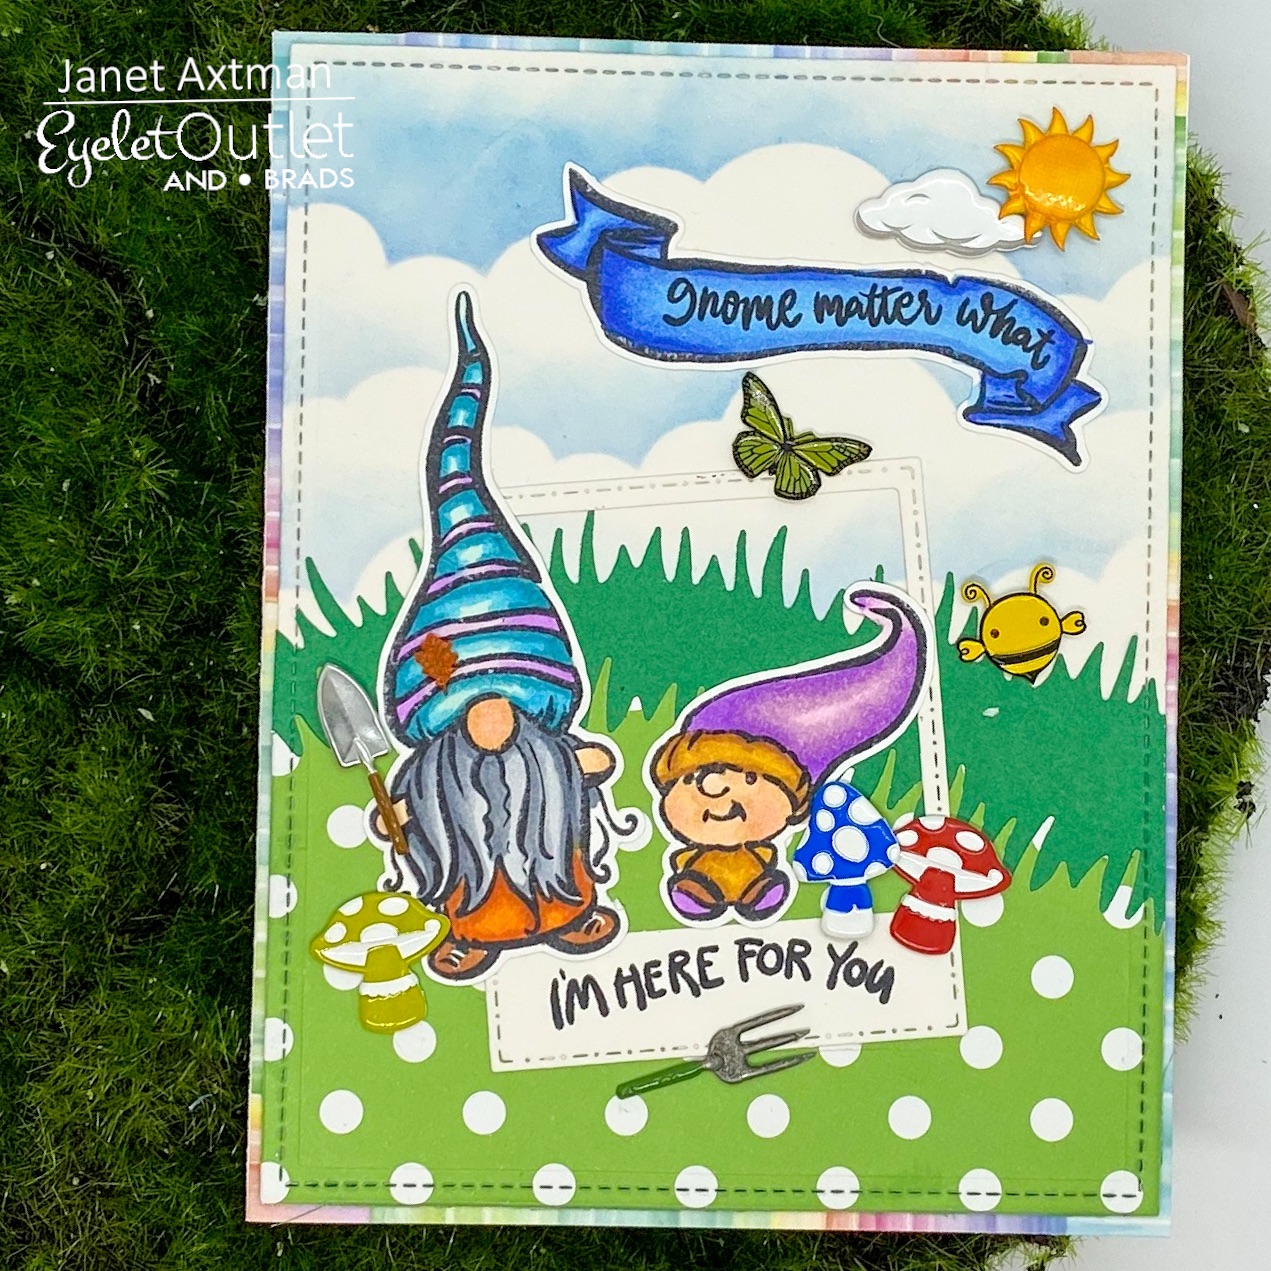
Hello Eyelet Outlet Fans! Today, I thought I'd join in on the Gnome craze and make a card featuring Eyelet Outlet products. 

Now, we do have a Gnome Brad Set that is super cute too but I don't have them at this time. They would have been adorable as a third or fourth gnome on the card and I plan to add them to my collection for that reason. The good news is that there are so many fun brad sets that are just the right size to coordinate with the gnome character stamps out there right now. Hooray!

I created the background using a cloud stencil and Broken China Distress Oxide ink. The grass was made with a die set. Once I had the background together, I die cut it using a rectangle stitched die. I colored and cut out the two gnome characters and also cut out a polaroid die cut. I aranged these on the card and placed the gnome characters in and around the polaroid die cut. Then the fun began! I used the Garden Tool Brad Set and put the garden shovel in the gnome's hand and the garden fork below the sentiment. Mushrooms and gnomes go together so I added three of them from our Mushroom Brad Set. The Funky Bee Brads go great with this cartoonish-style card and I added a green butterfly from the Butterfly Brad Set. Finally, I used the always versatile Sun and Clouds Brad Set to add some interest in the top right corner of the card. Honestly, you really need this set because it can be used so often and it really accents a sky background so well. Can you make out the last brad set I used? Look closely. I used one orange mini leaf from the Mini Leaf Brad Set on the larger gnome's hat. I love it! One of the Mini Ladybugs would also be cute on his hat as an alternative. 

Once all the brads were in place, I put a single row of the new Color Wheel Washi Tape around all 4 edges of my white card base. This creates a rainbow border around all four corners of the card to finish it off. 

I hope you enjoyed this little voyage into gnome-ville. I know I did. They are just so darn cute! Have a great week!


Sunday, August 9, 2020

Hoppy for You!

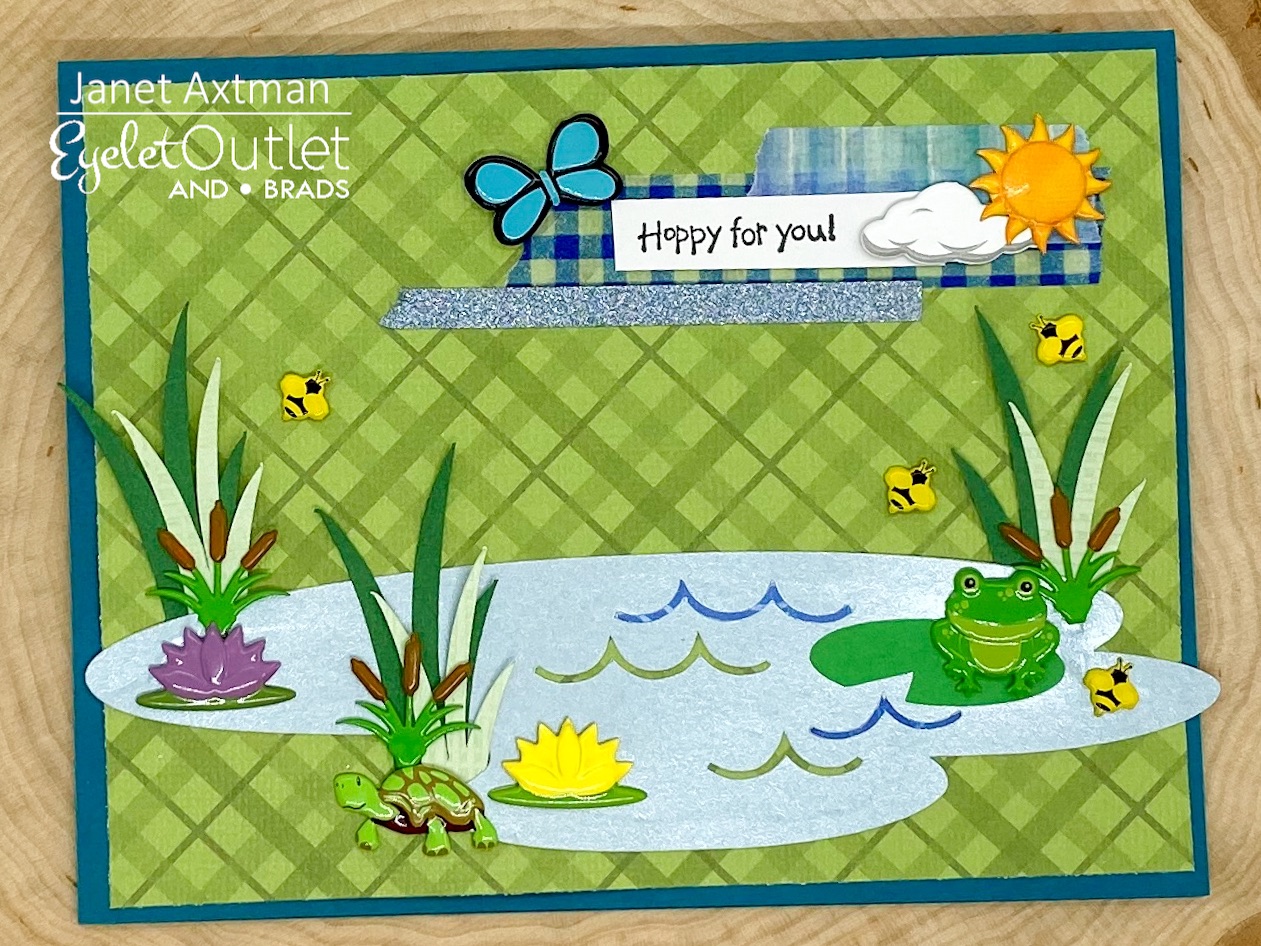
It's a hoppy summer day so why not celebrate someone with a pond and it's frogs, turtles and bees! This happy card reminds me of long summer days. Some would say it reminds them of spring but in my youth in North Dakota, ponds didn't look like this until late July or August because the season is so short and cool until then. 

There are several sets used here. The Frog Brad Set is so much bang for your buck because you get the frogs, cattails AND the water lillies. The Mini Bee Brads are just the right size for the scene and the Turtle Brad looks so happy too!

I had a bit of space up at the top and I love I could fill it with three different washi tapes and the Sun and Clouds Brad Set. The washi tape used is the new Color Wheel Washi, Skinny Glitter Washi which is a set of 6 colors, and the Checked Blue Washi. The Bright Butterfly Brad make it all work together.

Make yourself a summer scene while the sun is still shining!


Tuesday, September 18, 2018

Dinner and Cocktails

It's Kim from Katydid Cards today!

It's been a while since I've worked with the Chicken Brads so I just had to make another card using them.  I call this card, "Dinner Invitation" and you can see why.  These two chickens have been invited to join their neighbor for dinner.  Here they are at the front door.


And here they are inside.  What's that on the menu??  Uh Oh!  I used the Cooking, Baking, and Mixer Brads as well as Brick, Color Wheel, and Flower Washi Tape. The door handles are Black Enamel Dots.

If you're interested in recreating this card you will find the card base, kitchen, and cleaver in the Silhouette store.    The chef is from My Favorite Thing's Recipe for Happiness.  The chalkboard is free clip art I imported into the Silhouette and typed what's on the menu...inspired by my DT Sister, Susan's, Wednesday meal postings.


Here's a closer look at the brads and washi.


Winner, winner chicken dinner!

No dinner would complete with cocktails, so I'm sharing another card adding the Rooster brad.  I showcased him in a shadowbox card.  Each layer uses a different digital paper from the Cocktail Party collection by JazzyPatterns.  I also used the Cocktail brads on either side of the greeting.


On the reverse of the card are my favorite chicken brads again!


I'll see you next week with another card...there's no shortage of ideas what with all the brads, bling and washi in the Eyelet Outlet store.


Kim from Katydid Cards
Who provided the inspiration for these cards?  Katy did!

Tuesday, June 12, 2018

Wedding Wishes

Hi, folks!  It's Kim from Katydid Cards.

June, the time for weddings!  And for the wedding and bridal shower cards, too.  Here's a shower card made with three of Eyelet Outlet's latest brad releases; the Wedding Brads (Ring and Champagne Glass) and the Dress Brads.

I made a gatefold card with soft colors and patterns which served as the perfect backdrop for the brads.  The alternating banners make for a unique opening.


A closer look at the brads reveals I added some Jewel Bling for the diamond with some additional bling around the "bubbly".  The dress brad comes in an assortment of colors, but I wanted my bride to wear white.  Fortunately, these brads take heat embossing like a champ.  After I attached the dress to the banner, I tucked a tiny bit of tulle as the veil with another jewel for the headpiece.


Inside, the Silver Bell Brads were just the right accompaniment to the sentiment.


After the shower come the nuptials and here's my second card helping to celebrate the big day.  In addition to the same Bell Brads in Gold this time, I used the Cross Brads, Glitter Gold Enamel Dots, and Color Wheel Washi Tape as my "stained glass" window.  The roof and doors were covered with Chalk Board Washi Tape.


The front doors open to reveal the greeting.


And here's the inside of the card.


 After the wedding, there's the reception!  And it wouldn't be complete without a wedding cake.  Here's my 3D version using the Fancy Long Bling with Pearls and Jewels.  There are those Bells again together with the Glitter Dot Washi.


The used the Glitter Washi as my color inspiration and even tinted the Pearls in the bling using Copic markers.  They take color beautifully.


When you're thinking weddings, think Eyelet Outlet for not only cards but decorations, favors, wrapping and scrapbook layouts to capture the memories.

I hope you enjoyed these wedding cards...see you next week with something new!


Kim from Katydid Cards
Who provided the inspiration for these cards?  Katy did!

Tuesday, May 8, 2018

Welcome Little One

Hello everyone.  It's Kim from Katydid Cards.

Two weeks ago I shared a card using the Baby Animal Brads at Eyelet Outlet.  If you missed it, you can see it here.  They're just so cute!  Since they were still out on my craft table (which looks like a hurricane just went through) I decided to use them again in a card I call, "Welcome Little One".


I paired the Baby Animals with the Sun & Cloud Brads and the Clear Glitter Enamel Dots.  The background was created using the Color Wheel Washi Tape.

I remembered seeing a baby mobile embellishment at my local craft store and I used the memory of that to make my own version.  Given the amount of time it took me, I should have just gone back to the store to retrieve it.  I cut it from gray and white cardstock and used embroidery floss from which to hang the animals.


 The soft colors in the washi tape provide the perfect backdrop for the mobile, but there are so many great options from which to choose. Just click here to see the large selection as we have some new stock in you won't want to miss.

I created the greeting and sentiment, matching it to the cardstock.  Here's the inside...with another opportunity to use the brads.


While these brads are perfect for baby themed layouts and projects, they can be used in other ways.  Here's a card I made with them sure to put a smile on the face of those who see it...at least that's my hope.


Kim from Katydid Cards
Who provided the inspiration for these cards?  Katy did!