Showing posts with label red jewel bling. Show all posts

Saturday, July 4, 2026

Happy Birthday America!


Happy Birthday America! From all of us at Eyelet Outlet we hope you are celebrating our country's 250 year anniversary this weekend.

This card features lots of patriotic brads and red and white bling to give it some extra shine.


Thanks for stopping by today. Please make a visit to the Eyelet Outlet store to stock up on your brads, bling, washi tape, and paper flowers. Check out the clearance brads  while you're there. You'll find some great deals on a HUGE variety of EO favorites. All bling is also on clearance so be sure to check it out.


Happy Creating!

Sunday, November 16, 2025

Christmas Wreath


I have another Christmas card today. the lovely word background was created with Christmas Washi Tape. It works really nicely and was created by cutting a die out of an A2 piece of cardstock covered with strips of the washi. Then I pieced the individual pieces back into the frame portion of the die. 

On top of the background, I placed a wreath and bow I had stamped and colored before cutting it out. It is adhered with foam tape to give it some lift. I decorated the wreath with Angel Brads and Red Jewel Bling. In each corner I added the beautiful Holiday Bling. Then I wrapped some twine around the spine of the card and tied a bow.

 Thanks for joining me here today and please visit the EO store for all your brads, washi tape, bling and paper flowers!


Happy Creating!

Friday, November 7, 2025

A Reader's Friend

Hello Crafty Friends - I am excited to share this fun bookmark with you today.  I enjoyed using Eyelet Outlet's Book Brads, Book Washi Tape, 3/16 Round Eyelets - White, Jewel Bling, and Eyelet Setter to create this bookmark.  Eyelet Outlet has a wide range of products to use on your crafting projects.  This bookmark is a thoughtful gift for the avid reader in your life.

I used a bookmark die to create the base for the design.  In the top and bottom boxes I used the bookmark brads.  In the center two boxes I used the bookmark washi tape.  I added some bling with the jewel bling in red and blue, and used a quicklet eyelet to reinforce the hole at the top.  The quicklet eyelets are so easy to use with the eyelet setter.  No Crop-A-Dile punch tool needed.

I love how this bookmark turned out!  Thank you for visiting the blog today.  I hope this inspires you to create a fun project using Eyelet Outlet products.  Please visit Eyelet Outlet for easy to use embellishments.


Shopping List

May you find joy in creating!


Stephanie Wheatley

Sunday, August 18, 2024

A Wreath of Christmas Cheer


 Hello Eyelet Outlet fans! Janet here today with yes, a Christmas card! I hope you'll forgive such an early post but we have new holiday brads and well, you'll just have to forgive me for playing with them. It's too hard not to!

Wreaths are such a quintessential holiday symbol and I recently received some new dies to make wreaths so I thought I'd put one together and decorate it with EO brads and bling. The truth is that you can use just about any shapes to make wreaths but one secret to it all is to start with a donut shaped ring out of cardstock in the color you are using and build on top of it. This is similar to making real wreaths. My cardstock wreath elements all started as white pieces. The dies imprint the leaf veins so when I inked them up, the veins and other marks really come to life. I arranged one layer at a time and glued just the center of each leaf so that the edges would stay dimensional and allow me to tuck other leaves under them here and there. The goal is to make is look as realistic as you can. 

Once I was satisfied with the base wreath, I started attaching brads and bling. Here I used the new Angel Brads and added Pinecone Brads, Poinsettia Brads and Red Jewel Bling. Then I added two layers of foam tape which gives a good amount of lift. I gently shaped the edges of the wreath downward to create a slightly domed look which again mimics a real wreath. I debated adding a bow but decided to feature a Tree Retro Brad in the center instead. I like the clean and cheerful look this gave it.

To finish the card, I chose a striped holiday paper for the background and cut an arch shaped mat in white. I stamped Merry Christmas at the bottom and then I applied the wreath and the silver circle with the Tree Brad. There's a lot of white space toward the bottom so I added three Green Glitter Enamel Dots to the front. This is quite pretty and elegant don't you think?

SHOPPING LIST:

Thanks for joining me here today. Please visit the EO store for all your brads, washi tape, bling and paper flowers!

Happy Creating!


Janet - YouTube - Blog - Facebook - Instagram - Pinterest

Saturday, November 25, 2023

This Christmas Card Pops!

Do you give a lot of gift cards over the holidays?  I know I do so I wanted to make a cute Christmas card that is also a gift card holder and after adding some embellishments from Eyelet Outlet, they are just extra special now.

The front of the card is made with quite a few EO embellishments.  The background is Green Glitter Washi Tape with Silver Blocks Glitter Washi Tape layered on top.  That is where I built the Christmas scene.  The felt Rudolph is wearing an adorable Santa Hat Brad and has several Brown Jewels as little spots on his back.  He also has a cute Black Pearl eye and of course, a large Red Cut Jewel Bling for his nose.


The large felt present is surrounded by many little presents to include three Gift Brads right up front.

 It wouldn’t be a prefect Christmas scene without some snow, right? I added some 3-D snow on the bottom and some beautiful Snowflake Brads falling from the sky.


 Once you open the card, a cute gift bag pops up where you can place a gift card!


On the left side of the card, I embossed a Christmas tree and added two of the large Red Jewel Bling for sparkle.

The right side has the Ho Ho Washi Tape lining the top and bottom along with four of the Holiday Light Brads in each corner. To finish off the inside, I added a simple Merry Christmas sticker sentiment and added several of the Red Jewel Bling as the holly berries.


Thanks to all the easy extras I added to this card, I think anyone would just love to get it…even without a gift card…lol

Shopping List
Silver Blocks Glitter Washi Tape
Green Glitter Washi Tape
Santa Hat Brad
black Pearl Bling
red Jewel Bling
brown Jewel Bling
Ho Ho Washi Tape
Holiday Light Brads
Snowflake Brads

Have a wonderful week and always be STRATE-UP CRAFTY!

💗Stacy

Saturday, November 11, 2023

Thanksgiving Table Place Cards

Who’s ready for another Thanksgiving table decoration?  For this week’s creation, I made Turkey Place cards.  These are perfect for showing everyone where to sit and for a sweet keepsake for each guest.

I made three different place cards and with Eyelet Outlet’s assistance, was able to make each one as cute as the next.


The first place card is for Sean. His is made by using the Groovy Washi Tape, black Pearl Bling for the turkey eyes, red Jewel Bling for his body and finished off with a rustic Pinecone Brad. 

The next place card is for Caden.  His place card also has black Pearl Bling for the turkey eyes, brown Jewel Bling for his body and finished off with an adorable acorn brad from the Acorn and Squirrel brad collection.

The last place card is for Ms. Ryley Ann. Her turkey has black Pearl Bling for eyes, orange Jewel Bling on the body and highlighted with a cute little Pumpkin Brad. 

Place cards are super easy to make and are fun little gifts to give your guests. All you need is a little cardstock, scissors, glue and the cutest embellishments from Eyelet Outlet! 

More Thanksgiving décor next week!!!!


Have a wonderful week and always be STRATE-UP CRAFTY!
💗Stacy

Saturday, April 9, 2022

I Love You with Every PIZZA My Heart

Hey everybody! I hope you had a great week! Leslie here, sharing a fun 'love you just because' card created with our new Pizza Flatback Resin along with our Plaid Heart Washi Tape, Red Jewel Bling and Pink Enamel Hearts! This was a fun one, for sure!

I cut a standard A2 size top-folding card base from 110# white cardstock along with narrow panels from 80# white cardstock and red cardstock. I covered the white cardstock panel with Plaid Heart Washi Tape and layered it on the red cardstock and then adhered it to the bottom of the card base. I created a pizza pan by cutting a stitched scallop circle from light brown cardstock, and added tiny dots of Dark Walnut Crystal Drops to the scallops around the edge. I adhered the pizza pan to the card front and then stamped the sentiment in light brown ink. I added the Pizza Flatback Resin along with an Enamel Heart. The finishing touch was adding some Red Jewel Bling. 


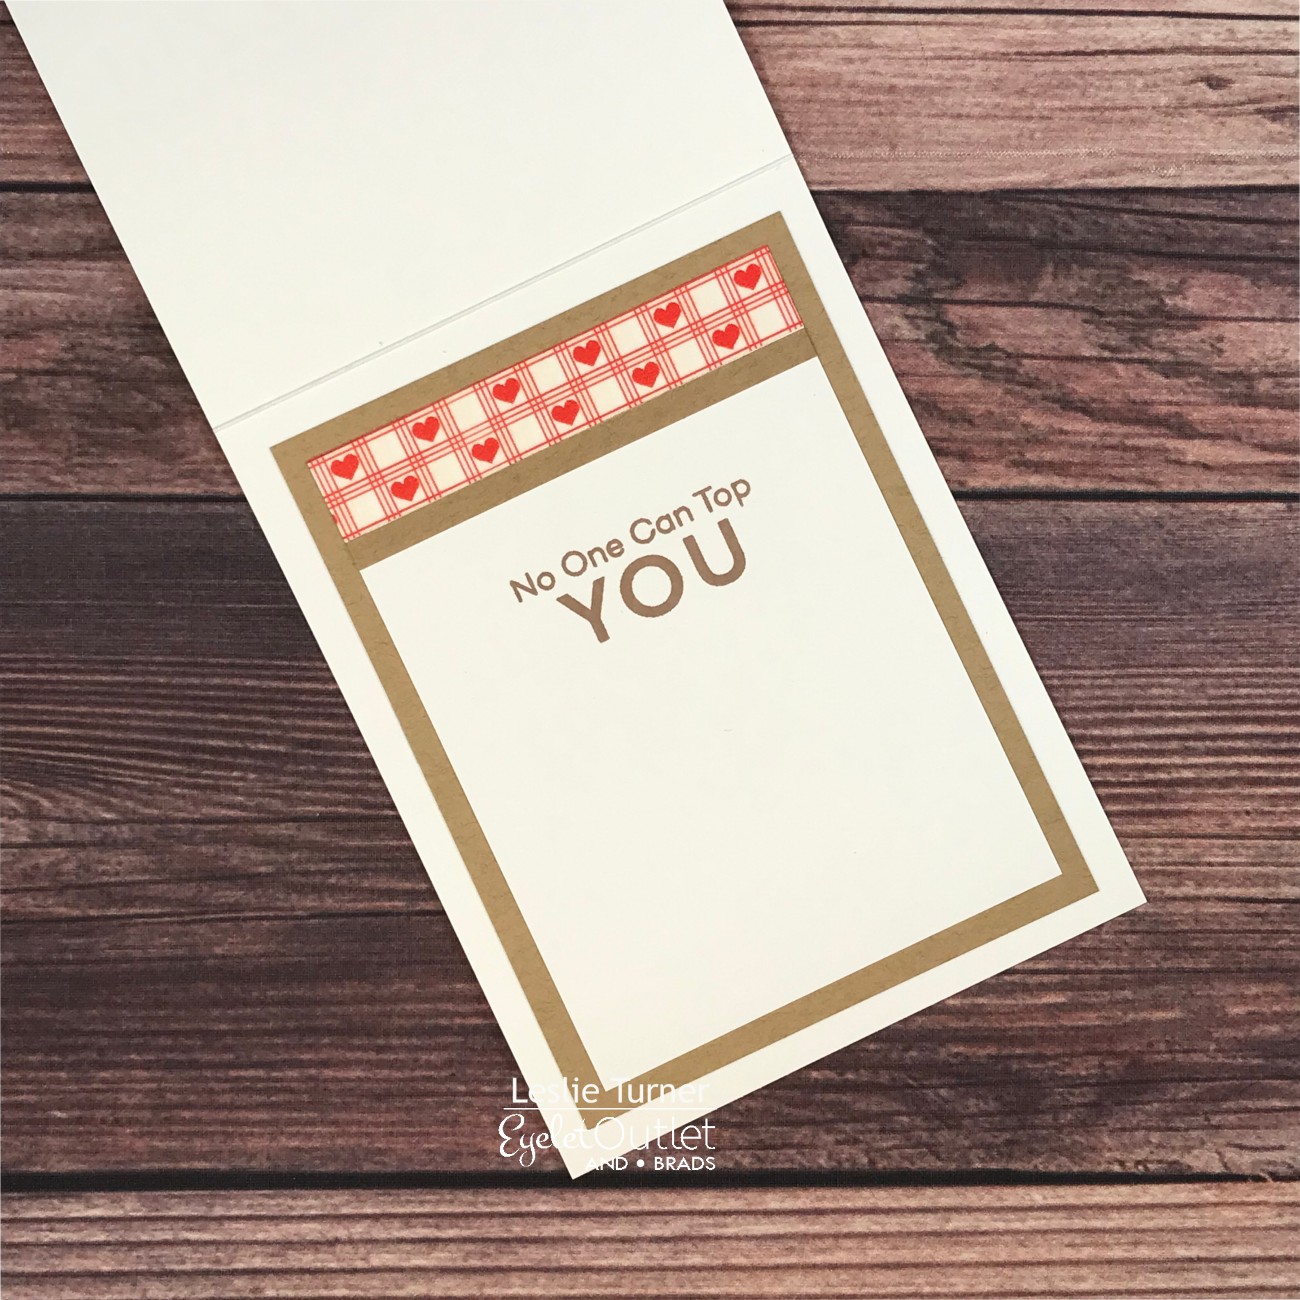
I cut the inside panel from 80# white cardstock and embellished it with a strip of the plaid heart washi tape and a narrow strip of light brown cardstock. I stamped the sentiment in light brown ink and layered the panel on brown cardstock.


Thanks so much for stopping by today - we'll see you next time!


Leslie Turner
Blog / Facebook / Instagram / Pinterest / Twitter

Friday, January 17, 2020

A Little Pickup

This week's card entitled "A Little Pickup" is a fast and easy masculine get-well card.  Yes, indeed, it's fast and easy!  What makes it so fast.....did you know that Eyelet Outlet carries their own stamp sets?  Yes, and pair that with a Red Truck Brad and paper of choice, you'll have a card in no time.


1.  Select two or three coordinating papers of choice appropriate for a masculine card.  (My first strip is 1/4", the plaid is 2", the second dark strip is 1/8", the light green solid is 2 3/8" and the final dark strip is 1/4"; these measurements are dependent upon the size card used.) Cut paper and adhere to card.

2.  Using the Eyelet Outlet Truck Stamp Set, stamp the little pickup sentiment on the card as shown.

3.  Create a double or triple mat (as desired) and pop up an Eyelet Outlet Red Truck Brad on the mat.  Adhere the mat to the card below the sentiment.  Add an Eyelet Outlet Jewel Bling on each side of the truck if desired.

Final Step:  use a stamp of choice or hand print 'get well soon' in the lower portion of the card.

The card is complete and ready for your hand-written and/or stamped message on the inside.  The recipient will not only have a laugh, but also appreciate the work you've done to show you're thinking of them during a challenging time.

Eyelet Outlet supplies used:
Red Truck Brad
Truck Stamp Set
Red Jewel Bling 

Head on over to the Eyelet Outlet site to pick up the stamp set, red truck brads, jewels and many other items.  While there take a look at our newest release--- POLAR BEAR BRADS!  These bears are fun and irresistible.  With more winter to come, these bears will keep us busy into the spring (and then some).

Happy Crafting!


Tuesday, January 8, 2019

Heart Strings

Hi there.  It's Kim from Katydid Cards.

As card makers, we're busy doing Merry & Bright in October.  And we're ringing in the New Year in November.  So it should come as no surprise we've been thinking about Valentine's Day even before we put away the Christmas decorations and make (and sometimes already break) our New Year's resolutions.

Here's the first of several cards I'll be sharing with you to help celebrate matters of the heart.  This type of card is an X-Fold.  To create a custom opening for the Heart Jewel Bling, I scanned one of the hearts and imported it into my Silhouette design screen.  I offset it three times; once for the white heart mat, one for the red heart mat and then the third offset was used to create the opening in the 4 1/4" x 5 1/2" rectangle.


I cut four of the rectangles and scored them down the center.  I made one more offset of the rectangle and hearts to create the patterned paper panel.  The dots offered an opportunity to randomly place Red Jewel Bling.

I attached each of six hearts to the white mat to have hearts on both sides of the red mat.  Each was then attached to a red mat.  I lined up one set of three inside the opening of one of the rectangle panels.  When centered, I attached white bakers twine down the center back.  Then I flipped them over and aligned the second set, securing the baker's twine inside.


I attached the baker's twine on the back of the first folded rectangle panel.  Then I attached each panel back to back to create the X.  Here's a look down from the top to see the "X" effect.  To finish, I created the greeting banner to run down the front.  I have a similar blank panel on the back for a personal sentiment.


Next week I'll share another Valentine's Card.  And here's a link to another card I made using the Heart Jewel Bling if you care to check it out.


 Kim from Katydid Cards
Who provided the inspiration for these cards?  Katy did!

Tuesday, December 25, 2018

Oh Christmas Tree

Hi, Kim from Katydid Cards here.

Merry Christmas to those of you who celebrate the holiday.  Wishing a fabulous day to those who do not.

I wanted to share one last Christmas card celebrating the Christmas tree inspired by a card I saw on Pinterest.  I love the look of white on white with that pop of red provided by the Red Jewel Bling and greeting.  My photo doesn't do that bling justice...you should see how it catches the light in real life.


And speaking of white trees, I want to share one of my Christmas past memories with you.  For more than a few years, we had a white artificial tree (in the days when artificial trees were pretty darn ugly).  Each year my mother would decorate it with Christmas balls of a single color.  And then the piece de resistance was the color wheel to shine brightly its four colors on the tree.  Oh, how my mother loved that tree.  Me, not so much, but it's still a fond memory.

Here's a look at the card from the side so you can see the dimension provided by the In the Woods Thinlits Dies by Stampin' Up.


And here's the inside, simple but sincere sentiment.


See you next week, which will also be next year, with another card.


Kim from Katydid Cards
Who provided the inspiration for these cards?  Katy did!

Thursday, December 20, 2018

It's a Wrap!

This is my last post before Christmas.  Decorations are up, gifts have been bought, Christmas cards have been mailed and it's all coming together for our Christmas celebration with family next week!  The excitement is building as I'm doing my favorite part - gift wrapping!  

This year I made initials for each family member's main gift and after spray painting them, I embellished them with Eyelet Outlet brads that coordinated with the wrapping paper.  

I loved the way the poinsettia brads paired with this pretty wrapping paper I found at Kohls!


I found this wrapping paper at Hobby Lobby a few years ago and I LOVE the cardinals on it.  The Eyelet Outlet Cardinal Brad looks like it was made for this paper, too!  


Next up, my granddaughter got the Snowman and Snowflake Brad with her snowflake paper!


I thought the new Pinecone Brads paired with a touch of greenery I made with my Cricut looked so great with this plaid ribbon, don't you?  


And of course, I had to do one with some bling!  Here I've used some red jeweled bling to serve as my holly berries for the holly I cut with my Cricut.  The new Pinecone Brads look awesome here, too!  I've found so many uses for them that I need to get some more!  


And last but not least, Santa's Reindeer can really fly now because Santa's Sleigh is finally empty after dropping this gift off for my husband, Don!  


If you're wrapping presents today, bring out your Eyelet Outlet supplies and have some fun with it!  Merry Christmas from all of us at Eyelet Outlet!


Tuesday, August 21, 2018

Cupcake Ferris Wheel

Hi!  It's Kim from Katydid Cards visiting with you today.

Do you like Ferris Wheels?  I'm not fond of heights, so they aren't my favorite but THIS Cupcake Brad Ferris Wheel definitely appeals to me...and my sweet tooth.  The brads come in three different colors; the two I've shown here and a really cute pink version.  I have plans for those pink cupcakes on a future card.  But let's talk about this card for a bit.

The ferris wheel was created using a cut file I purchased in the Silhouette store.  It would be easy enough to make without a purchased file, though.  Just some triangles welded to a circle.  The base of the ferris wheel is a simple triangle.  After I attached the cupcakes to the wheel, I felt it needed a bit of additional support, so I cut a circle of the sky blue to attach behind it.


The center of the wheel is adorned with "lights" of Red Jewel Bling.  The center is a Bumpy Circle Bling which I colored to match with a Copic marker.  I also used the bling in the four corners of the mat and on either side of the label.


For the inside, I created a print only image by filling the cut file with color and increasing the transparency so it didn't detract from the sentiment.  Both the greeting and sentiment are from the Birthday Carousel stamp set by Stampin' Up.


I made another card with the cupcakes which is pretty darn cute and makes me smile, so I thought I'd share the link with you just in case you'd like to take a look.


 Kim from Katydid Cards
Who provided the inspiration for these cards?  Katy did!