Showing posts with label silver glitter washi. Show all posts

Monday, March 27, 2023

An Egg for You


This is a delightful spring image from Power Poppies.
I colored it with Copic Markers and then die cut the image
and framed it in a scalloped die cut.

The image was then decorated with lots of fun embellishments
from Eyelet Outlet. I included small pink enamel dots and the larger 
12 mm clear bling jewels to accentuate the die cuts.

The top and bottom borders of the card also received a bit
 of sparkle with my favorite washi tape in Silver Glitter.
I am so looking forward to spring and I love all the eggs, bunnies
and pastel colors so you will be seeing more of spring from
me in the coming weeks.

Shopping List for Eyelet Outlet:
12 mm Clear Bling Jewels
 Pink Enamel Dots
Glitter Washi Tape in Silver


Elizabeth - Blog


Monday, October 3, 2022

Holiday Tags


Christmas is coming and packages need to be decorated. The Eyelet Outlet 
has new holiday brads including a Santa, carolers, tree, deer and gnomes.
They are so fun to use on tags and really add something cute to your package.

I stamped the snow globe and then fussy cut it out. I added silver glitter
washi tape to the Santa tag and Glitter Winter Washi tape to the carolers. Added
the new holiday brads and long bling strips. Then included baby bows
 and a sentiment. Have fun with these new brads!


Elizabeth - Blog

Sunday, October 24, 2021

Warm Winter Wishes Slimline


It's Janet here for Eyelet Outlet. EO has so many perfect brads and washi for holiday cardmaking. It's literally hard to figure out what you want to use! 

Today I have a holiday slimline card featuring the new Female Cardinal Brad. It pairs so perfectly with the Cardinal Profile and Cardinal Brad sets that have been carried a while in the store. The Holly Brads are also so versatile and can be used on any holiday card. I used one here as part of the cluster that the cardinals are perched on. I also used Snowflake Brads in the background. 

It's also easy to bling up your cards using EO washi and bling. Here I used Glitter Silver Washi and Sparkle Red Glitter washi for the mat and for the border going through the card. Just apply the tape to cardstock and cut with your favorite die or electronic cutter. So easy and you waste hardly anything!

As a finishing touch, I added some White Pearl Bling and Green Jewel Bling to the middle of the snowflakes. So pretty!

Thanks for stopping by today. I hope you visit the store and get your holiday card making started. 


Happy Creating Everyone!


 Janet YouTube - Blog - Facebook - Instagram - Pinterest 

Sunday, December 6, 2020

A Big Nurse Thank You!

Hello EO fans! Today I've got a special thank you card for a nurse. All healthcare workers need words of encouragment right now.


This card was made for my college roomate who has been an ICU nurse for 25+ years in a very large metro area hospital. Probably like many nurses, she came down with COVID-19 about a month ago and she's just now going back to work again. I hope this card makes returning to work just a little bit easier. 

To start, I first put Silver Glitter Tape on each side of a white A2 card base. Then I cut a slightly smaller mat out of red and white patterned paper. I used a stitched die for this but you can also just cut a rectangle at 4" x 5 1/4." Then I used the white piece which was gifted to me by a crafty friend. Any shape would work equally well. Then I covered a piece of white cardstock with Sparkle Red Glitter Tape and cut it out using a heartbeat die in my collection. If you don't have something like this, a heart could be used and you could draw the heartbeat in. It doesn't have to be perfect since it's just a jagged line. Just avoid it being too flat! LOL! That wouldn't be good!

I stamped the thank you sentiment from a Lawn Fawn set. Before I glued the white shape on to the card, I set the Nurse Brads and placed the Enamel Hearts and Enamel Dot. Then I glued it to the red mat and mounted the finished piece on fun foam before attaching it to the white and silver glitter card base. Inside this card, I included another heart and a smaller version of the heart beat to tie it together.

I hope this inspires you to thank a health care worker in your life. Have a great Sunday!

Sunday, November 29, 2020

Happy Sunday Eyelet Outlet Fans! I hope you've had a great weekend so far. For the US fans, you probably have given your stomach and your body a good workout over Thanksgiving and then decorating for Christmas and the holiday season. It was nice to take a break during all the hubub yesterday to reflect and make a card to remind me of the Reason For The Season.


The background of this card was created by placing Silver Glitter Washi Tape on the edges of an A2 card base. Then I placed the corrogated piece on top. Here's a upcycling tip I learned from Carol Duval when I was a wee one (LOL!). Use a liner from a light bulb box! Works perfectly and they tend to be either a nice white or natural color like this one. The city scene is made from two identical Heartfelt Creation die cuts that I cut and stacked to appear as if it were on a hill. I used a few pieces of foam tape for some of the cuts for added dimension as well. I nestled in two Palm Tree Brads and then started decorating the rest of the card.

Around the scroll (Heartfelt Creations), I placed the Snowflake Bling-1 1/2" Size and two of the Music Note Brads. To accent the scroll image, I cut single bling apart from Red Strip Jewel Bling. I'm always amazed at how a few Eyelet Outlet Products can take a card from good to great with just a little bit of effort! 


Thanks for stopping by today. Enjoy you Sunday and I'll see you again next week!

Thursday, November 12, 2020

Christmas Tree O Christmas Tree

Today I've brought out the washi tape to create this shimmering gift tag.  The tree is covered in Eyelet Outlet's very popular Glitter Star Washi tape, then some swirl bling brings even more shine.


I used the wood grain washi tape for the tree trunk and across the bottom I used silver glitter washi which I trimmed with my scissors to create the look of drifts of snow.

Thanks for stopping in today!


Wednesday, October 10, 2018

Washi + Flowers + Bling!

Hi folks, it's Lauren here again. Everyone knows how much I love to wrap presents, especially for my nieces and nephews. So when my niece Lindsay Marie turned fifteen (15!!!) last week, I wanted to go big, which meant I needed ALL my favorite Eyelet Outlet embellishment categories: washiflowers and bling!


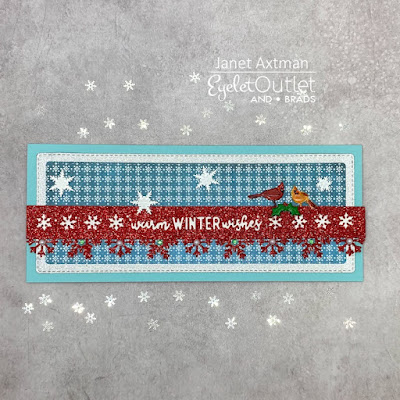
I've mentioned before that I'm kind of... well... cheap, lol. So if I can buy plain giftbags inexpensively --or better yet-- if I can re-use a shopping bag, I'm a happy camper. In this case I started with a very pretty oversized bag from the New York Botanical Garden. It was exactly the right size and had that neat fern detail on the front and back. Unfortunately, it had the logo, too; in really large print. I tried putting ordinary washi over top, but the black typeface still showed through. Luckily, I had some glitter tape, which is very sparkly but not at all see-through. It also lets me avoid the wrath of Lindsay's father (my brother, Bill) who has declared glitter giftwrap and ribbon OFF LIMITS in his home, since he's only just now finally gotten all the carpets clean after last xmas' giftwrapping excesses.


I love to personalize presents. It is my belief that *everyone* secretly hopes the fanciest gift is for them, and that most of us totally get a kick from our name being on it! I recently found these beautiful, oversized, silver chipboard letters, and they looked good on top of the glitter tape, but my motto is: NEVER give up a chance to embellish!!! So I added a strip of Zigzag Purple tape and a fun Skinny Foil tape to each letter before adding them to the bag.


Lindsay's favorite color is purple (in case you hadn't guessed, lol!) so I finished off with some Purple Paper Flowers with purple Flower Jewels at their centers. I cut some older green flowers apart to serve as leaves, and finally added most of a package of clear Swirl Bling... cut apart and slightly re-arranged, in order to fit the space better. 


Don't forget to drop by again for designer inspiration, every day! ♥

has rarely met a Sparkly Thing
she didn't love!

Sunday, October 7, 2018

It's All About the Dress

Hello!  It's Kim from Katydid Cards and today my cards are all about the dress.  The Dress Brads from Eyelet Outlet, that is.  This adorable dress comes in a pack of five different colors, something to suit everyone!

And here are three of the colors in this first card I'm sharing with you today.  In addition to the dresses, I also used Bumpy Round Bling as well as Brick and Purple Checked Washi Tape.


To make this look like a storefront, I cut an opening as a window and backed it with acetate before mounting the brick panel, attached with mounting tape.  After cutting the awning, I attached it directly to the brick panel at its top and on dimensionals at the bottom.


I created the greeting in Silhouette Studio and notice the little store sign which happens to be patterned after Eyelet Outlet's own logo.

I matched the sentiment inside to one of the fonts used on the front, leaving plenty of room for a personal note.


Next up, I borrowed a quote from Karl Lagerfeld which seems a perfect partner for the black dress.  In addition to the dress, this card showcases the Pearl Bling in two sizes as well as the Chalkboard and Silver Glitter Washi Tapes and patterned paper from a Black & White Collection.


And inside, I created a birthday greeting playing off the quote on the front.

 
I've used the dress brads before, combining them with the Loads of Love Clear Stamp.  If you missed them, you can find them here.  See you soon with something new!


Kim from Katydid Cards
Who provided the inspiration for these cards?  Katy did!

Thursday, February 15, 2018

I Had To Kiss A Few Frogs!

We've all heard the saying about having to kiss a few frogs before we can find our prince!  That was certainly true in my case!  I was almost 40 years old when I finally found my prince and we'll soon be celebrating our 20th wedding anniversary!


To create this fun little card, I began with what I call a "Z Fold" card base which is an 8" x 5 1/2" piece of card stock, scored at 2" and 4" inches.  I used the adorable frogs from the Eyelet Outlet Frog Brad set and lips are cut from red card stock using one of the many lips images available in Cricut Access.  


Here's a closer look at the happy little frogs!  They are so cute, you almost wouldn't mind kissing them!  LOL!


Check out the prince's crown!  I used the crown from Cricut Everyday Pop Up Cards cartridge. Look how the Eyelet Outlet products took this crown over the top!!  I used Silver Glitter Washi Tape, Clear Jewel Strips, and Clear Tear Drop Bling.  Isn't it stunning?!  

Did you know that Eyelet Outlet is a vendor at over 40 retail scrapbook and rubber stamp shows each year? Be sure to look at our show schedule to see when we may be in a town near you and come see us in person!


Tuesday, January 9, 2018

Movie Night?

Today I'm using Eyelet Outlet Washi Tape & Brads for this week's CAS(E) this Sketch!


I used two colors (and widths) of Glitter Washi Tape to create the top portion of my card and then added some Film Strip Ribbon between the sections.


I used four different movie-themed brads matted on black & silver circles.  The "Movie Night?" sentiment was printed, and the purple stamped sentiment is from CAS-ual Fridays Coffee Talk.

Do you have a favorite movie snack?  I love Milk Duds with my warm Popcorn.

Eyelet Outlet Products Used:

Did you know we have a Flickr Gallery to showcase Eyelet Outlet Design Team Creations?


You can visit me in blogland at Ingenious Inkling,
and you can find Lauren & I making holiday cards
all year long at Jingle Belles


Friday, December 1, 2017

Winter Wonderland


Happy December, everyone!  With Thanksgiving behind us and today being the beginning of the month, it is officially time to really get into the holiday spirit if you haven't already!  

I am here with a pair of coordinating cards in a soft, elegant color combo.  This designer paper has kraft, silver foil and white in its color scheme, which really goes well with pretty Eyelet Outlet pearl and jewel bling,  swirly rhinestone bling, silver glitter washi tapeclear 12 mm jewel blingantler brads.  


The pearl and jewel bling sparkle like ice and snow, and even the antlers, which could be thought of as more sportive and masculine, look really lovely in combination with metallic silver and gold ink.  


Here the swirls of bling mimic the printed swirls of the designer paper, with jewel bling and small rhinestones strategically placed on the snowflake and accenting the greeting.  I love it when a card has big impact for only a little time and effort!

I love crafting holiday cards when the tree is up, the house is decorated, and Christmas music fills the air.  The week between Christmas and the New Year is usually quiet (and technically it's still Christmas since there are the 12 days!), so it's a great time to get a head start on next year's cards!  Something to think about!  ;) 

Have a great weekend!


Tuesday, November 14, 2017

Washi Tape Christmas Trees

Today I used two different techniques to turn Washi Tape into Christmas Tree Cards.

The first one is inspired by the silver metallic tree that my Gran had in her formal living room each year.  I would sneak into the room in the dark to watch the lights reflect off the silver needles.

I started by attaching two different silver glitter washi tapes to cardstock and then trimming the washi tape into smaller strips.


I then used adhesive to attach the strips to green cardstock to form my tree.  Next I used four different kinds of Eyelet Outlet Bling & Enamel Dots to decorate my tree.  


I finished with a layered glittery star & one more piece of bling.

For the next tree I combined three different Eyelet Outlet Washi Tapes.


I started with the Merry Christmas at the bottom on blue shimmer cardstock and then worked my way to the top before adding a Square Bling *star* and a wood grain trunk.


I cut apart a Jewel Red Swirl Bling to use the multi-sized gems to decorate my tree.

I hope this gives you some ideas for using your Eyelet Outlet stash to create some fun Christmas Tree Cards.

Eyelet Outlet Products Used:

Did you know we have a Flickr Gallery to showcase Eyelet Outlet Design Team Creations?


You can visit me in blogland at Ingenious Inkling,
and you can find Lauren & I making holiday cards
all year long at Jingle Belles


Wednesday, April 5, 2017

Alien Brads: Out of This World!

Absolutely all of Eyelet Outlet's new Spring brads are awesome, in my opinion, but none are more fun than the Alien Brads, which are both adorable and otherworldly... so clearly I (Lauren) had to use them on a couple of different cards!


Scientists have recently confirmed that there *IS* life on Mars, but alas, there are no bakeries. So it turns out most of the UFO's sighted on this planet involve Little Green Men who have not enjoyed cake in far too long! 


I was happy to build these guys an appropriately-sized chocolate cupcake, then frost it with the help of two different sized cloud punches. I added a couple of Star Brads to make them feel at home. And obviously no cupcake is complete without a Cherry Brad on top!


One of my favorite ways to add a funky sentiment is with my trusty old-school label maker. In this case, I trimmed the labels down a bit, and affixed them kind of randomly, to fit the fun vibe of the card. I used another Alien Brad and the same set of supplies to create a sentiment inside, as well!


I often use funny quotes as inspiration for a card design, and I wish I could remember which comedian said, some years ago, that Area 51 didn't particularly worry him, but the thought of 50 OTHER such places made him a bit anxious! I typed the sentiment on clear labels which I affixed to a cloudy sky over a bit of patterned paper desert. Then I filled in the scene with another adorable Martian and a funky space ship made from paper, Glitter Silver Washi Tape and tiny 1/16" Mini Gold Brads.


Meanwhile, here in this galaxy, you'll have noticed that we now have even more fun for you here on the Eyelet Outlet Blog... some days there will be more than one post! That means lots of great ideas to make your cards and projects out of this world! Be sure to scroll down and see what awesomeness Designer Georgiana has thought up to inspire you! ♥

Lauren Bergold
 can be visited by blog-readers of all planets at
♥♥♥

Tuesday, December 27, 2016

Winter Washi Card w/ Video

Forgot to send Christmas cards but still want to?  Check out this fun and fast card using washi tape form Eyelet Outlet to make a winter greetings card!!


Here is a video filled of fun card ideas including the little tutorial for making the snowflake card.


It is never too late in the winter season to send out those winter card to friends and family!!

Supplies Used
Card - Canvas Corp
Washi Tape - Eyelet Outlet
Foil - Rinea
Punch - Fiskars
Stamps - Paper Wings Productions
Ink - Brutus Monroe
Adhesive - Xyron

Erin Reed - Designer & Artist
Blog
YouTube
ETSY
Instagram